“Portrait of a silent man ” by Patrick Eischen
About the tutorial
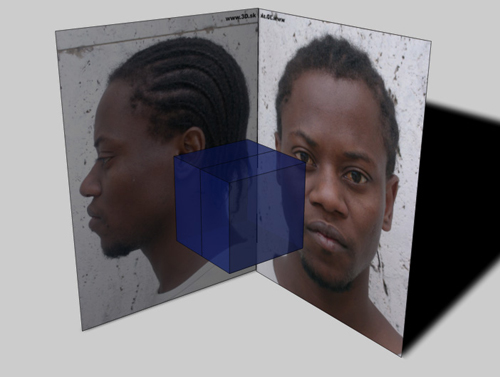
In this tutorial I’m going to show my workflow on how I created my „Portrait of a Silent Man“ image. I used Cinema 4D by Maxon, the BodyPaint and Hair plugin, Photoshop and reference images by http://www.3d.sk . Please note that this is not a step-by-step tutorial but rather a ‚Making of’ presenting the different steps in the creation.
About the image
There are many rendered portraits in a lot of galleries. I was always impressed by the high quality of the MentalRay FastSkin shader and how easy it was to set it up once you understood the basic concept of how skin works. But as I ‘only’ have Cinema 4D, MentalRay is not an option for me. But isn’t it possible to render realistic skin in Cinema 4D? I wanted to find out with this project.
The modeling
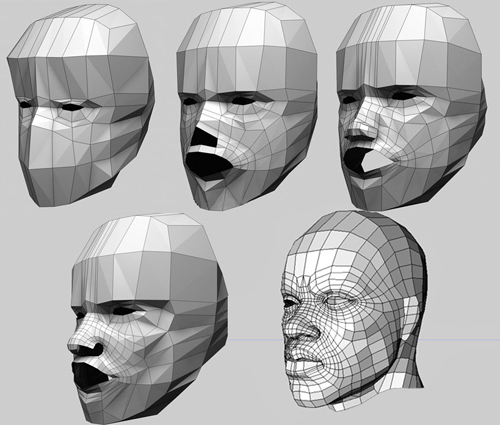
I usually start my 3d models with a simple cube (box modeling). I know that many prefer point-by-point modeling (or poly-by-poly) but I like using a cube and ‘cutting’ the detail in, step-by-step. Box modeling allows me to quickly block out the basic shape of the figure and thus to have a better feeling for the proportions of the model. But because I am using good references, any modeling technique would have worked.
The face finished, I began laying out the UVs (maybe the most annoying part of this job). Fortunately I found UVLayout (by Headus) , a program that flattens 3D geometry automatically.
The textures
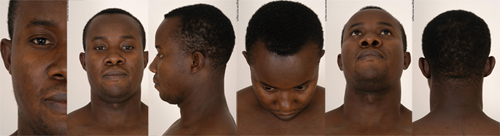
I took the model into ZBrush to add a texture to the face. Every inch of the texture comes from high-resolution photos which where projected onto the model with the ZBrush tools. All my reference photos as well as the texture references are from http://www.3d.sk .
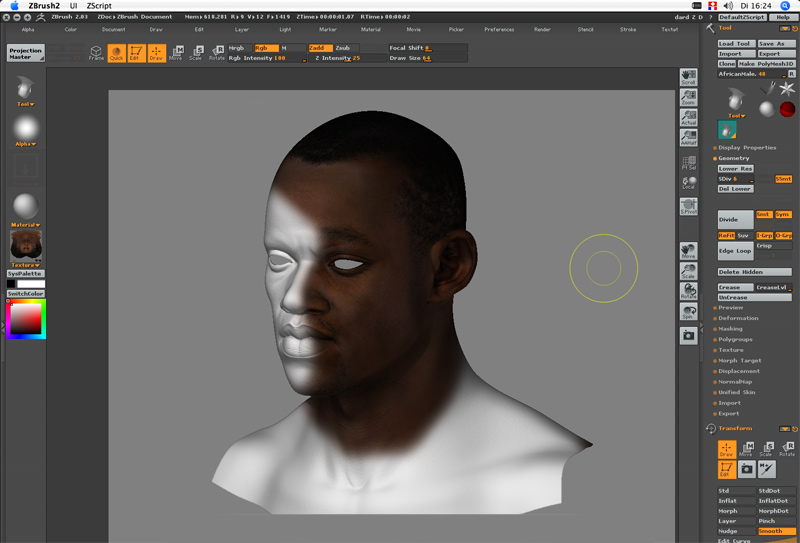
This is how the final head texture looks:
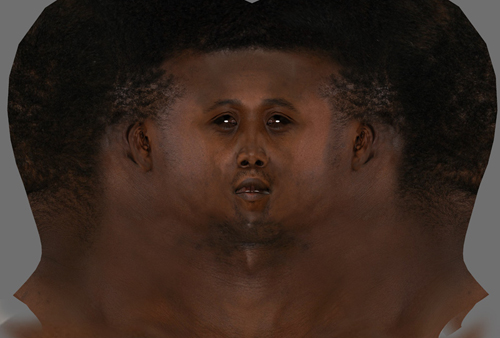
I used this same texture to create the skin details. I turned it into a black & white image and created a mask of it in ZBrush. Now I was able to use the Inflate brush and sculpt all the little skin details. I also included some volume for the hair with a custom brush. Finally I created and extracted a displacement map of the head.


Latest Comments