“Making of Set out for Lover ” by T.G.Jay
The first one describes the back light effect of hundreds of leaves. The leaves on the edge are bright and saturated. The second one describes the different between the front side and the back side of the leaf. The front side appears darker with high reflectivity. The back side seems to be translucent. That’s all! Actually, we can paint leaves now. But before we start, we’d better know something about shading.
Shaders are used to determine the relationship of color and illumination. What is the relationship of translucent and color? It seems to be more saturated near the terminator when objects look translucent. And the front side and back side of leaves have different relationships. The picture below shows five shaders.
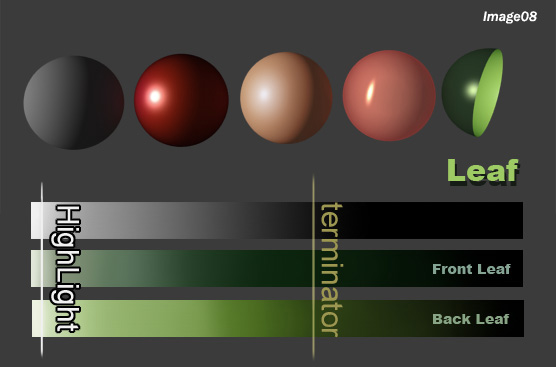
The last one is the shader of leaf. You also can see the relationship of color and illumination.
Then, let’s get started. It’s hard to get the breath-taking result by painting only one time. More times you paint, more levels you get.

You could paint leaves step by step:
• Define a leaf brush. Paint leaves’ shape. If you have a tablet, it ‘s easy to use pan pressure . One stroke forms one shape.
• Add brighter saturated color to the middle of every leaves.
• drop rough shadow of every leaves.
• Add darker and saturated color to the front surface of every leaves.
• drop highlight of front surface. Attention to distributing of highlights.
• If leaves are less than enough, add some.
• Don’t forget the backlight effects. The light is warm and bright.You can see the photo above for consideration.
• Blur the image and paint again…
Skill 5: Add some flavorings.
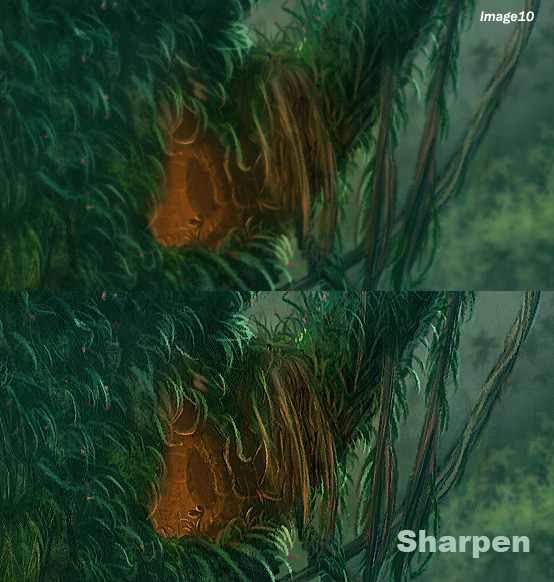
When you finished your work, you can add some flavorings at last. They will give you more details and make your image real. I do sharpness, glow and lens blur. Maybe you have another choice.
Making of Set out for Lover
Popular Tutorials
-
 Free set of photo references for our members
Posted on Nov 15, 2010
Free set of photo references for our members
Posted on Nov 15, 2010
-
 Photo References
Posted on Oct 6, 2010
Photo References
Posted on Oct 6, 2010
-
 Modeling Competition
Posted on Dec 10, 2010
Modeling Competition
Posted on Dec 10, 2010
-
 Modeling a High Definition Building – part 1
Posted on Dec 9, 2010
Modeling a High Definition Building – part 1
Posted on Dec 9, 2010
-
 FREE photo reference sets for you – only for registered members
Posted on Oct 2, 2011
FREE photo reference sets for you – only for registered members
Posted on Oct 2, 2011
Try something new

Latest Comments