"Making of Male Green Frog" by Massimo Righi
Introduction
Hi, my name is Massimo Righi and I am freelance CG artist from Italy. What I’m going to do, is to try and show you the main steps of how I’ve made my "Male Green Frog" image. I’ve used Maya 8 for modelling, MentalRay for rendering and Photoshop for the textures. The goal for me was to not only create a photo‐realistic render, but also a 3d model for animation purposes, without the use of ZBrush (or similar software) and without adding any kind of post‐work to the final render.
3Dtutorials.sk recommendation:
To maximise the realism of your 3D rendering we recommend using high quality animal photo references from the #1 texture website www.3D.sk
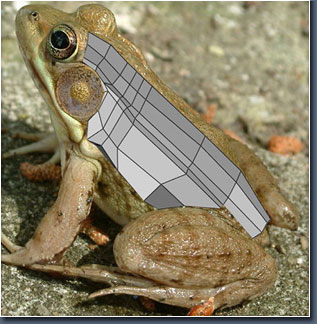
The first thing was to do some research to find some good references, having in mind the final result I wanted to achieve. I wasn’t able to find all the views of the same frog that I wanted, so I mixed a lot of different frogs in order to model the main shape.

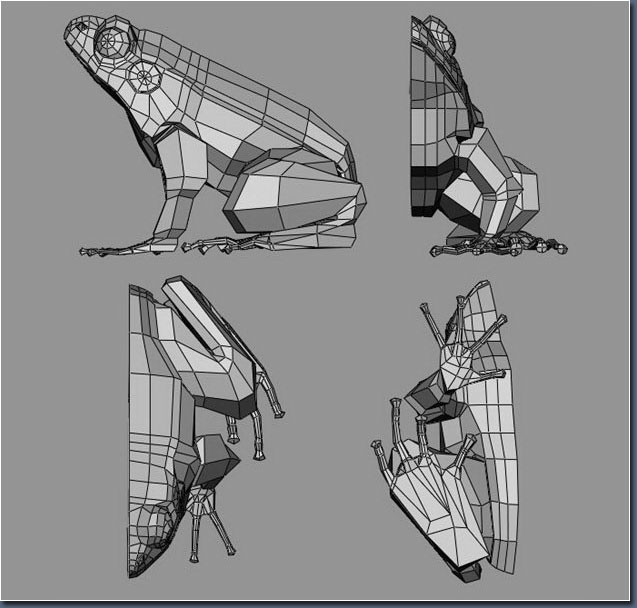
I’ve started building the low‐poly frog using a simple polygon plane and I’ve extruded the edges following the reference pics. I’ve then modelled the main body leaving holes where the legs are connected.

After that, I created the legs and then joined them to the body.

As you can see from the WIP pic below, I’ve built only half of the frog so that I had only half of the UV map to deal with.


Very good work indeed !!!
I love the depth of field and the skin textures of the frog…..amazing !! Thanks