By Sohail Khan, sk_sohail18@yahoo.com
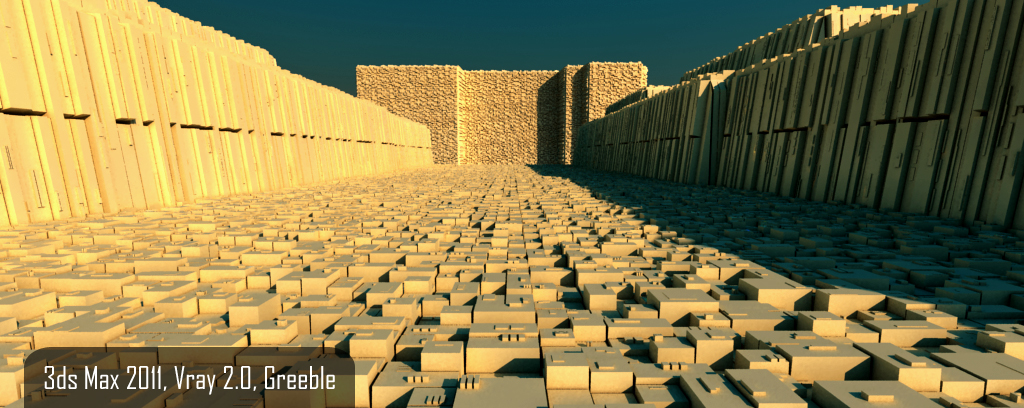
Software Used :3ds Max 2011, Vray 2.0, Greeble (A small plug-in to create random blocks) Download it here.
What you will learn in this tutorial? I will cover Basics of Greeble, Vray sunlight setup, Vray GI and Speed up rendering in Vray.
About Software:
3ds Max: Autodesk 3ds Max 2011 offers compelling new techniques for creating and texturing models, animating characters, and producing high-quality images. Incorporating tools that accelerate everyday workflows, Autodesk 3ds Max 2011 software helps significantly increase productivity for both individuals and collaborating teams working on games, visual effects, and television productions. Artists can focus on creativity, and have the freedom to iteratively refine their work to maximize the quality of their final output in the least amount of time.
Vray: V-Ray 2.0 for 3ds Max is a complete rendering solution, which combines the power of the distinguished V-Ray rendering engine with the flexibility and unprecedented speed of the interactive rendering system V-Ray RT, now running on GPUs. V-Ray 2.0 is officially on the market starting 6th December 2010. For more information on upgrade, pre-order and pricing policies, please click here.
Greeble: A fun modifier plug-in used for generating random details for spaceships, cityscapes , Death stars , etc.
Getting Started:
1. Fire up max and go to Customize->Units Setup… and choose Metric->Centimeters.
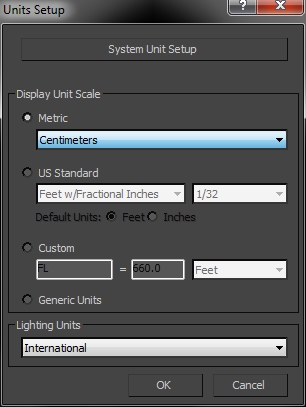
Choose Vray as a renderer.
2. Now drag and drop a plane in the Top viewport with Length 100cm and Breadth 100cm and both length and breadth segs as 100, 100.
3. Now right click the plane and convert it to editable poly.
4. Now click on polygon selection button.
5. Now drag it downward like this
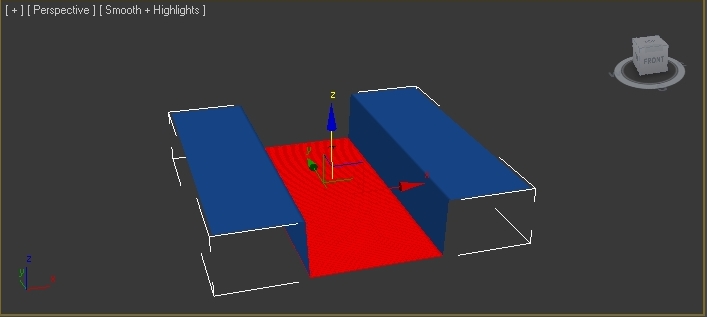
6. Now use the same technique to achieve this
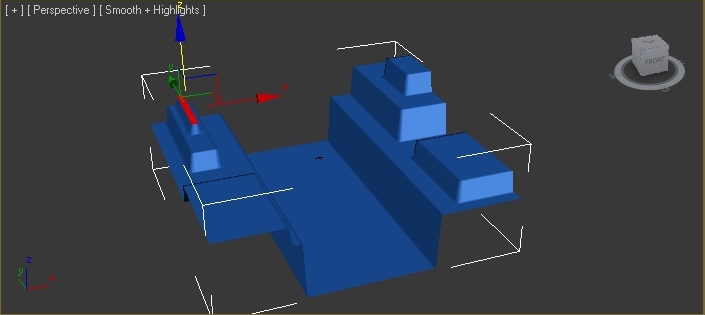
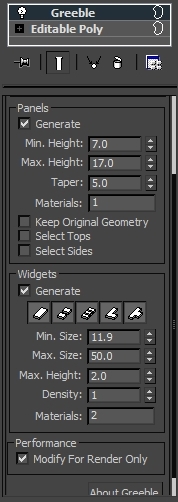
7. Now go to Modifier tab and choose greeble and use these settings…
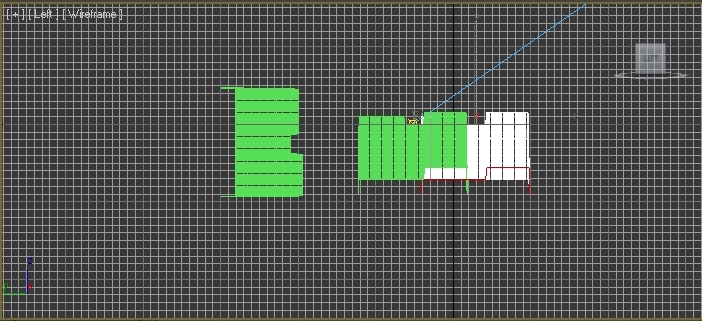
8. Now you need to make a clone of your plane and choose instance and rotate it 90® and place it like this
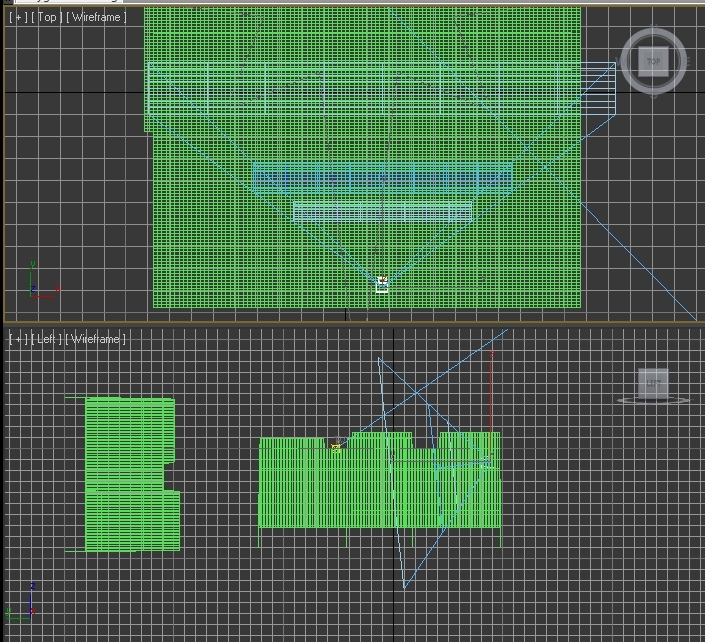
9. Now go Camera->VRay->VRayPhysicalCamera and place it like this in your scene…
10. Now select you camera and go to camera modifier tab and chosse these basic settings..

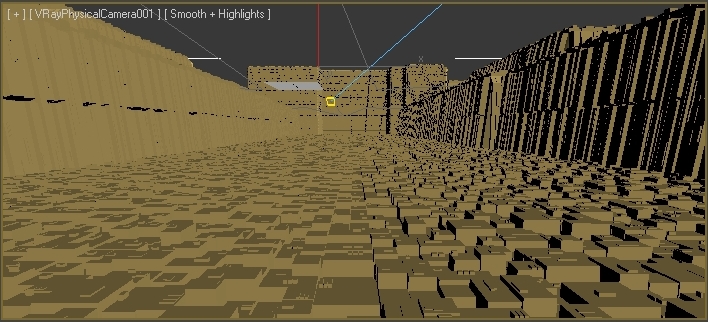
11. You will have something like this in you viewport if u deactivate Modify For Render Only in Greeble modifier…
12. Now it’s time to setup Sunlight system.
13. Now go to Create->Systems->Daylight system. And make it on top of your scene.
14. Now go to Lights->VRay->VRaySun. And make it on top of your scene (Don’t worry about the position).
15. Click Yes when asked about “Would you like to automatically add VRaySky environment map?”.
16. You will have something like this..
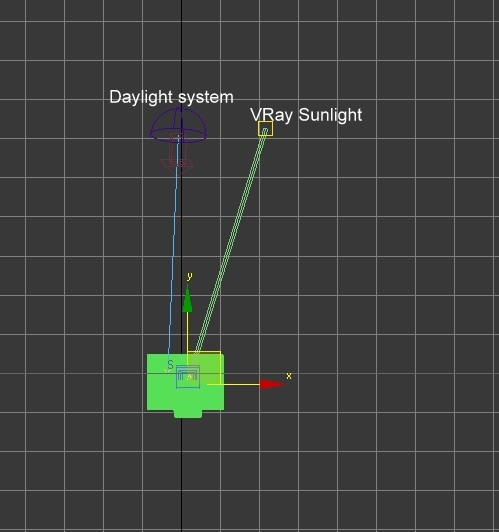
17. Now we need to position the VRay sunlight with the Daylight system.
18. Now select VRay Sunlight and go to Animation->Constrains->Position Constrain and in the viewport position it with the Daylight System like this..
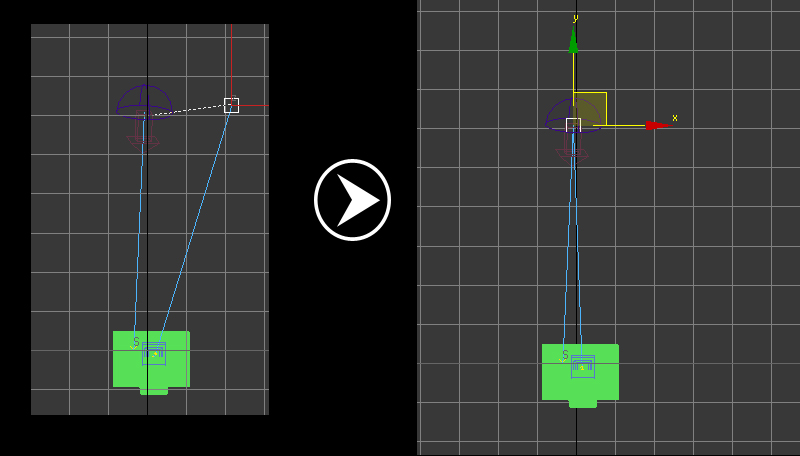
19. Now select the VRay sunlight Target and position it with daylight target.
20. Now click on Select By Name and choose Daylight.
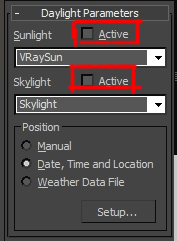
21. Now go to the Modifier tab and deselect Active in both Sunlight and Skylight..
22. Now click on Setup..
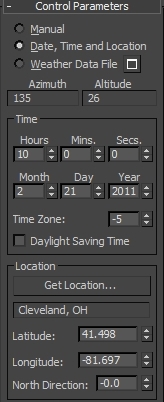
23. Click on Get Location and choose you favorite city.
24. Now play around with the time or choose these setings..
25. Now its time to render..
26. Choose the lowest possible render size like 320×240.
27. In the Indirect illumination tab select these settings..
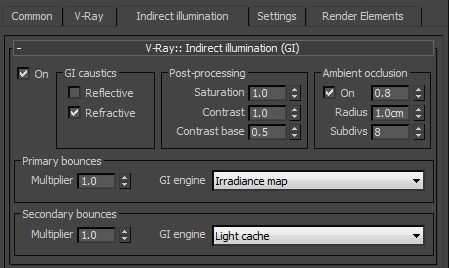
28. Irradiance map-Light cache settings is probably the best speed/quality ratio, so we choose these settings.
29. In Vray : Irradiance map tab select current present to High.
30. On the Details enhancement.
31. Mode to single frame..
32. And in the Vray tab->Vray::Vray Frame buffer, enable it.
33. In image sampler choose Type->Adaptive subdivision and choose Area.
34. In color mapping rollout choose Reinhard and gamma value to 1.5.
35. Now render the scene.
36. Now go to Render setup indirect illumination->Irradiance ma->mode , click save.
37. This way you can reduce the time which it takes to calculate the light cache andyou can load it again from the saved file.
38. Now choose the file you saved and select From file..
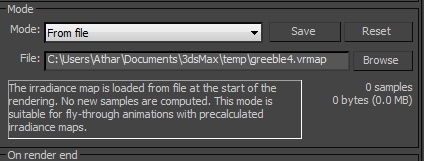
39. Now increase the render size settings and re- render it again.
I hope this tutorial was useful for you and if you have any question you can leave your questions in comments under this article! Thank you!
Visit www.hdrskydome.com to get great HDR skies for better rendering purposes.


good tutorial, a little confused as to what material to use, and as for the greeble parameters, I had to change them completely to get the same result as in your picture. Good tut though!
Nice..
Hi, nice tutorial! Only problem is that once you get to step 8 the instructions seem confusing.. which axis do you rotate on and how exactly is it positioned? I’ve followed the steps for this exactly but the Greeble effect and the floor of the plane does not show up?
Thanks
Fucking lame tutorial. after doing a 8th step nothing is understand and it will not show the required result. how to rotate and place tell us exactly what to do…..
like this site