“King Kong – part 3. ” by Dan LuVisi
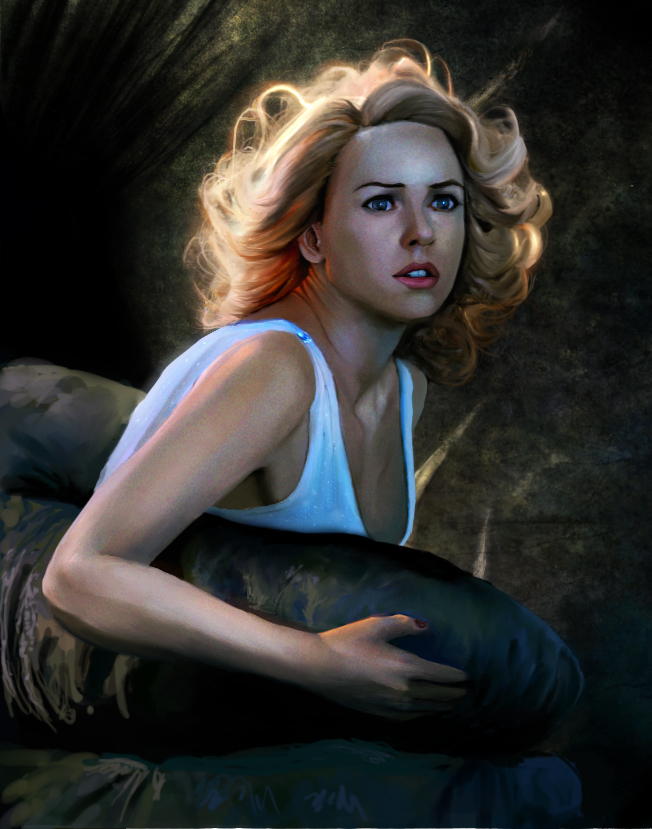
Ann’s Lips: All we have to do is finish off her lips and her face is done! Now for the lips, I haven’t expressed this before but make sure you get that crevice of her upper lip painted in there underneath her nose. To get the lips all finished up, what you want to do is simply define them, by doing so you can do this with three simple steps. First off, you can start to outline them with a dark shade of red/velvet. Start to darken in the edge of her lips, and make sure you work your way up and curve them at the two slants, then back down the other side. On the lower part, use a lighter red (than the previous dark one. After you have rendered her lips some more, darken the part underneath her lip where the chin bends at a slant.
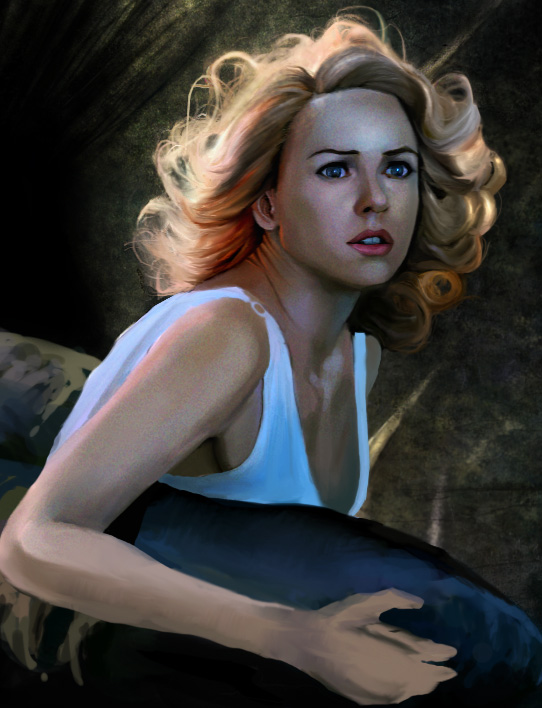
Coloring, Step 5 of Refining (Ann’s arm)
Ann’s arm: To fast forward through this part, just follow the same beginning steps on how to paint, to block in her arms underneath the line art. Once you get your basic colors (which should somewhat match her face) you can smudge them/blend them together. I smudged them, and then with a soft brush went over them with highlights and shadow colors to give the arm more depth. What I start on first is the highlights, such as the light vanilla colors on her shoulder down to her elbow. (Ann14.jpg)Then start to darken the underside of the arm with a soft brush on low opacity. Some whites alongside the bare of her arm also give a bit of form to the overall shape. Her hand will mostly consist of dark colors since no direct light is hitting it. On HER left side of the arm, some soft blues should be applied to give a cooler feeling to the underside of the skin. Also where the breast attach to her arm, give it a dark first color, applied with some more green/browns. Her shoulder blades where they connect near the neck, which I like the most out of the entire body, we’re really just done without even noticing it. But what I can remember was just molding of colors and getting the lighting down. Use the dodge tool, set on Midtones, and make sure the opacity is pretty low so you don’t strike too hard of a white mark on her. Softly go over the bumps of the bones, underneath the skin with the dodge tool to bring the shape of them out. On the opposite side of the highlights, use dark colors to counter react with them, thus giving them more depth. The highlights on her neck are a mixture of oranges and dodge tool, set with low strength. I also used the dodge tool, set on highlights, with a textured brush that spreads tiny dots all over to create the sparkles on her dress. For that sharp lighting on her jewels on the dress, I used my technique of setting the brush to Overlay with a bright blue, 30% opacity and stroking over it gently. Some touch up tips for the hands would be the orange highlighting on the upper ridge, lighting up hr knuckles and the fingernails. The rest of the texture is applied, right after this.


Great effort within this Jesse. Another thing in relation to Yext that is certainly well worth bringing up: if some of the actual mate internet sites has their own own report which is considered possession involving in that case that data takes priority.
[url=http://runforhumanrights.org/ugg-boots/uggs-moccasins-on-sale.html]uggs moccasins on sale[/url]