written by Weiye Yin
Creation Process of 3D MAX Work “Joy Tree”
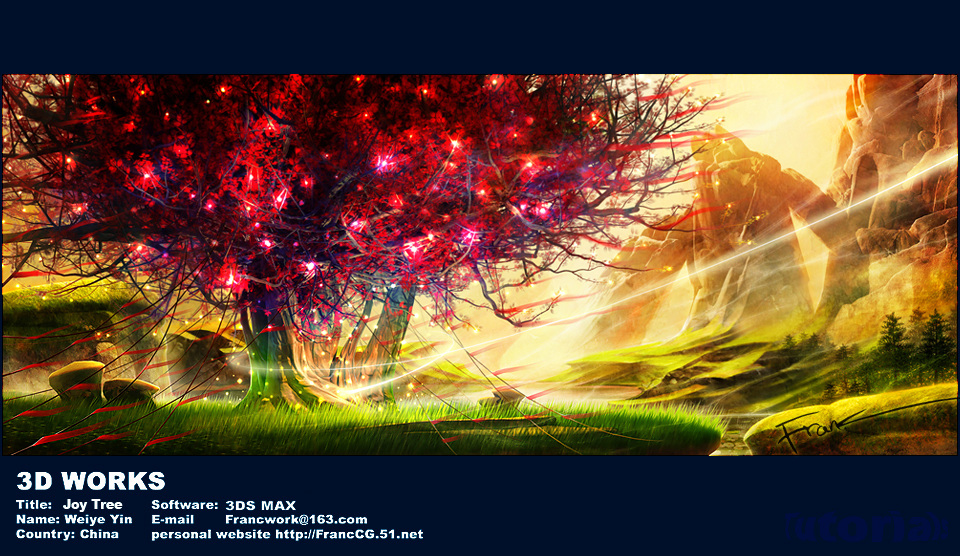
Creation Idea: “The wind blows away heavy mist in valley in the dawn, a shinning start flies across the sky and lands here, the bright light rises, which lights up red leaves of an ancient tree. The whole image is full of holiday happiness and exotic flavors. ”
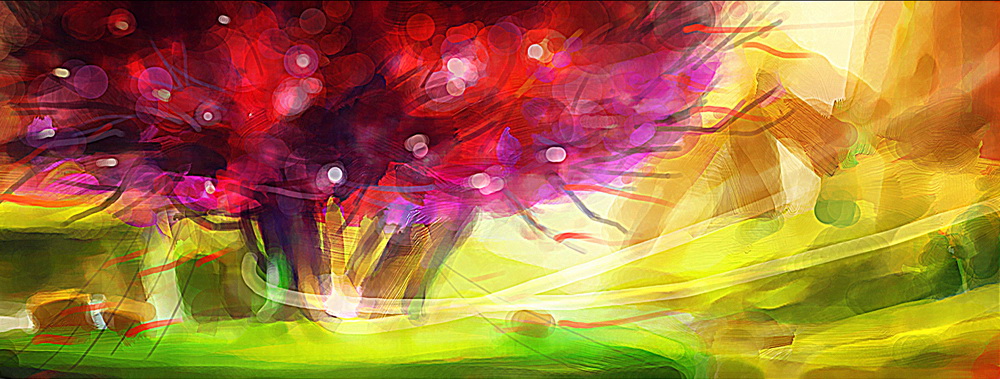
As 3D work should be more precise than 2D work, the creation process should be longer also, and the effect is often represented only in the end; to avoid deviation from the original design in the long making process, I drafted the concept of vagueness so as to master such kind of atmosphere exactly.
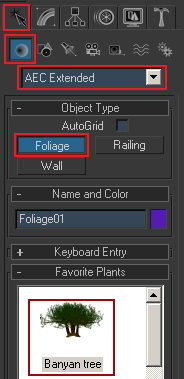
According to the draft, there should be a tree as above: select “Banyan tree” in Foliage.
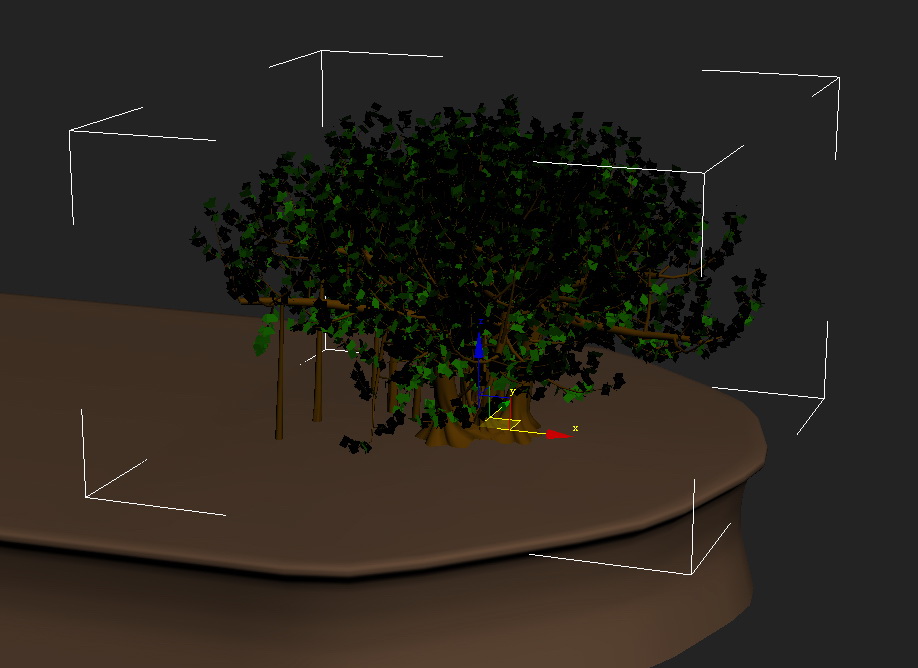
Set the tree on earth table that has been made.
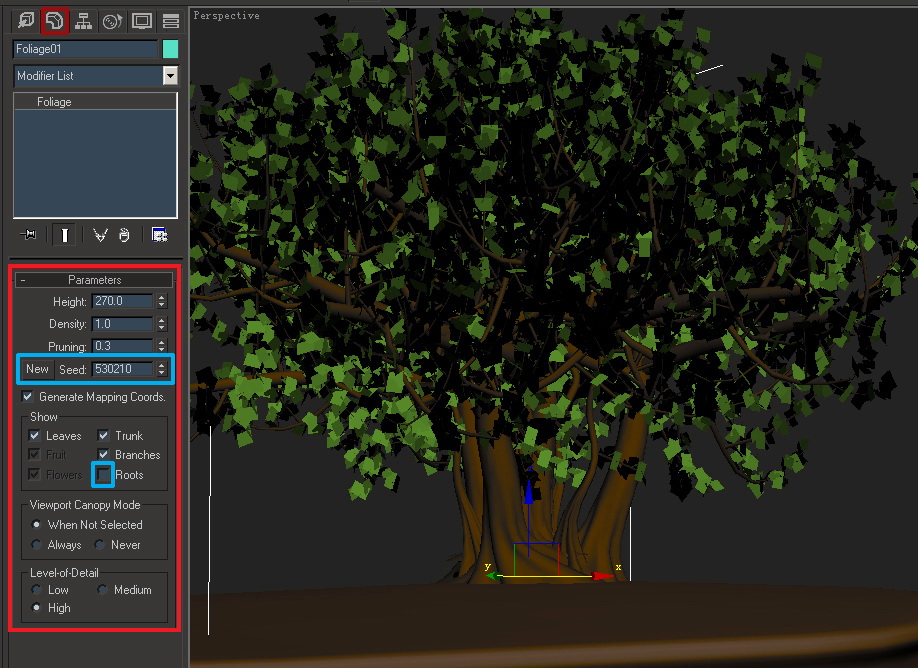
Open the Compile menu, adjust to get a satisfactory shape, what we need to pay attention to here: by clicking the “New” tag on left of “Seed” in “Parameters”, a random tree shape will be generated, clicking repeatedly will be unfavorable for returning to original shape and comparison, I suggest using parameters on right to “Seed” to adjust basic model; secondly, options under “Show” are about groups of tree, and one can remove redundant groups according to his needs, for example, in this work, I need a quite thick tree, though Banyan tree has quite appropriate shape, its Roots need to be removed, such removal will be used more often in following process.
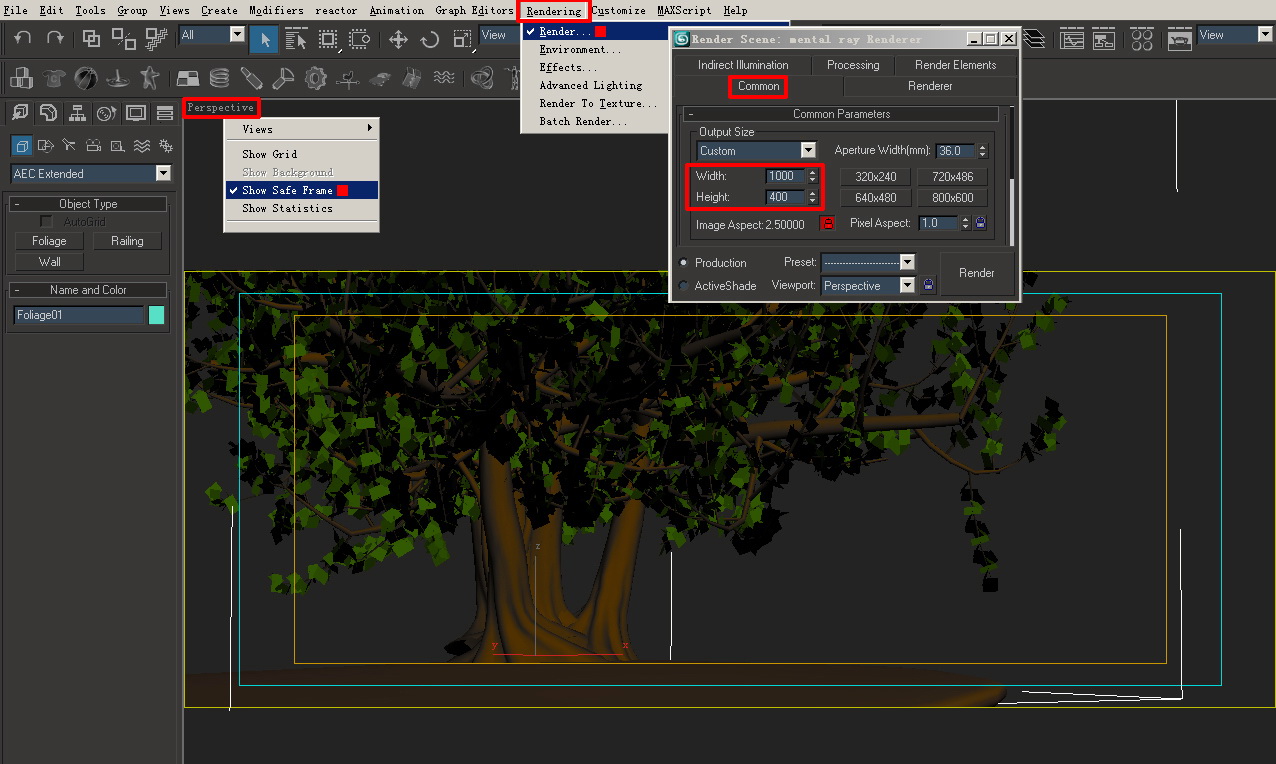
Adjust size of the work according to the draft, lock scale, and set up cameras. [Many artists like to do this step in anaphase, but as the work is oriented as “static”, a lot of unnecessary work could be saved if it is done earlier, for example, scene beyond the image becomes totally unnecessary to consider]
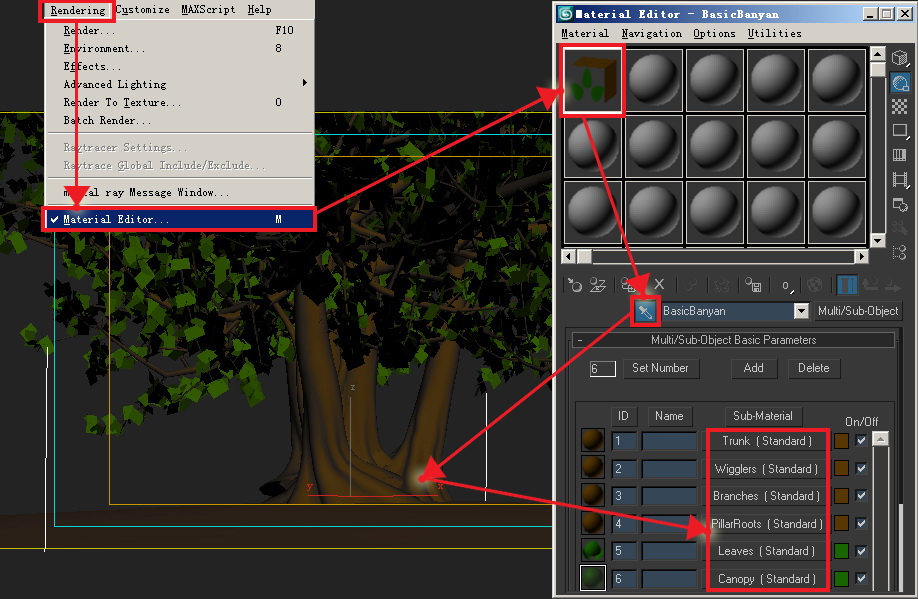
Open “Material Editor”, select a new shader, use “sucker” to suck materials of the “tree”, and we will find that the tree has 6 shaders, adjust the shaders accordingly.
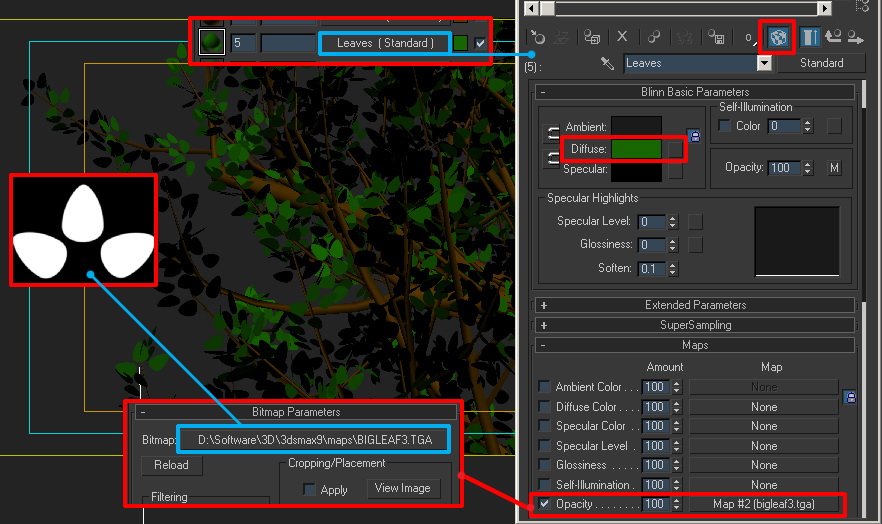
Start from leaves: open shaders of leaves, we can find that there is only one alpha texture, and no color texture in default materials, click “magic tube” icon to display leaves cut by channels, and open channel map [this is a default image provided by MAX, and we can find location of the file by path]
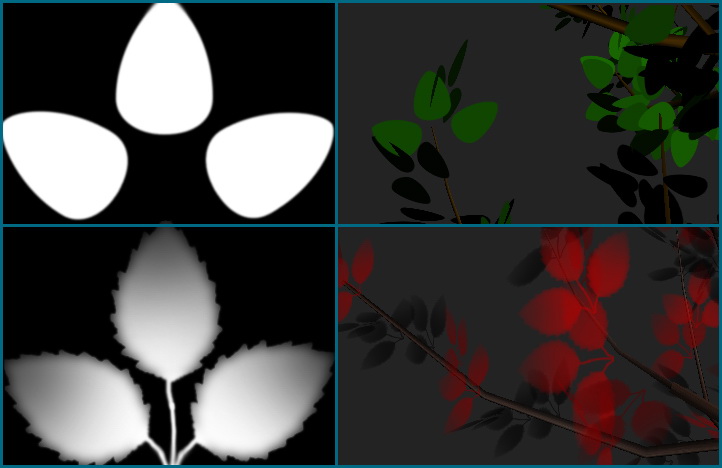
After adjusting channels, adjust color of leaves, and get corresponding effect.
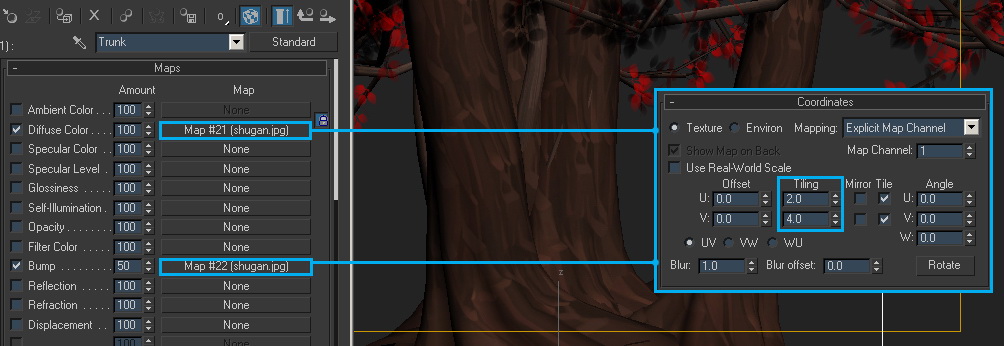
Use the same method to do: textures of trunk and branches, the texture has UV itself, texture is circular, adjust the cycle accordingly.
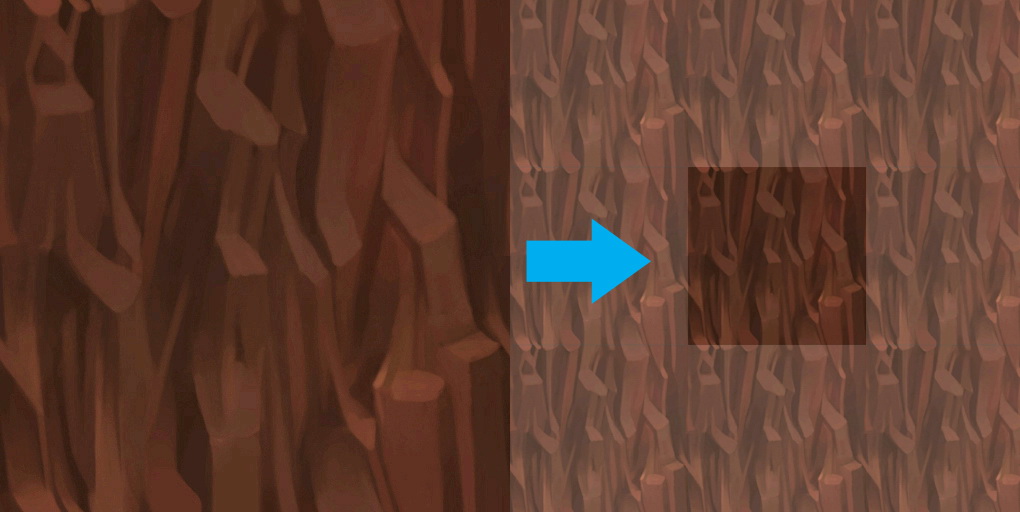
Circular texture is seamless texture that is circular in the upper and lower, left and right part. We can use “filter-translate” of Photoshop to create circular texture.
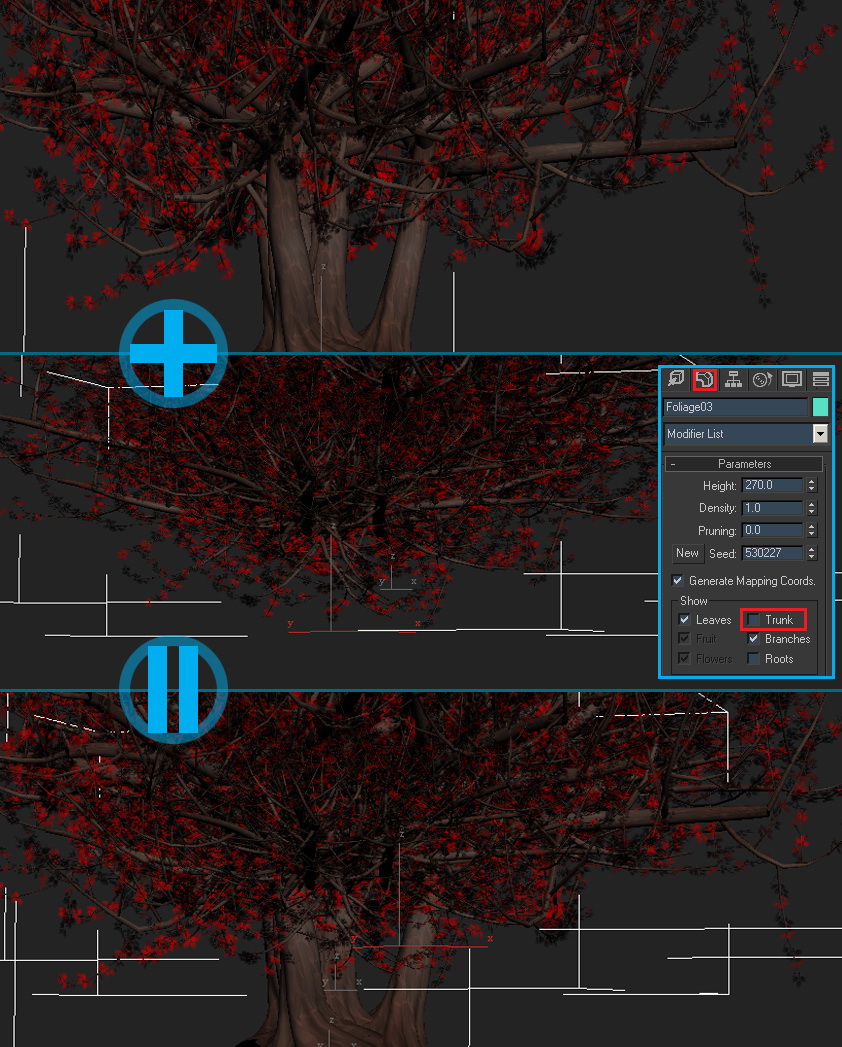
As density of leaves of Banyan Tree could not reach requirement of this work, I copied another two Banyan trees, and hide trunks, rotate them to different angles, the tree I need for the work is born at last.
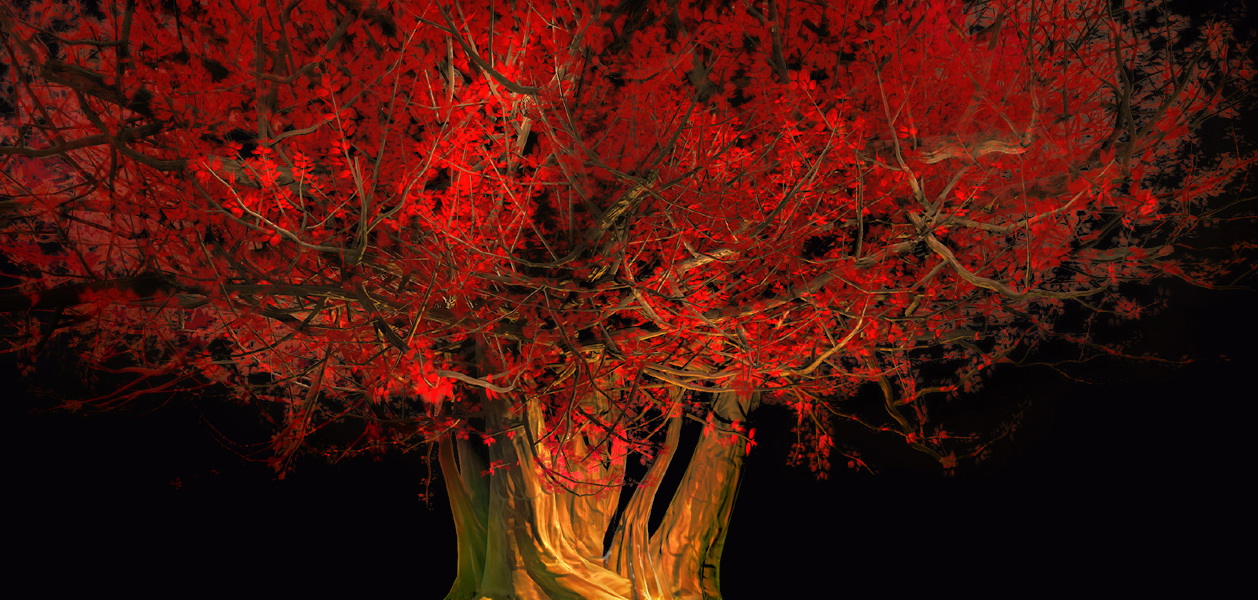
Effect after primary rendering.
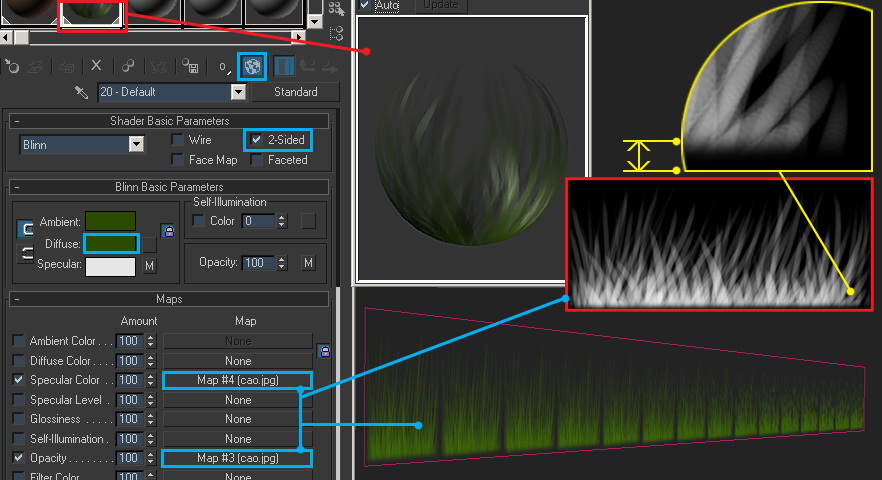
The next step is to make details of the earth table, draw an alpha texture of grass, method here is same as the leaves, only to put the circular texture on a different “plane”, color texture is same as leaves also, and use color in place temporarily. [What we should notice is that: the contour should be pure black, and there should be a black border where grass connects with grounds, or otherwise there will be sampling mistake]
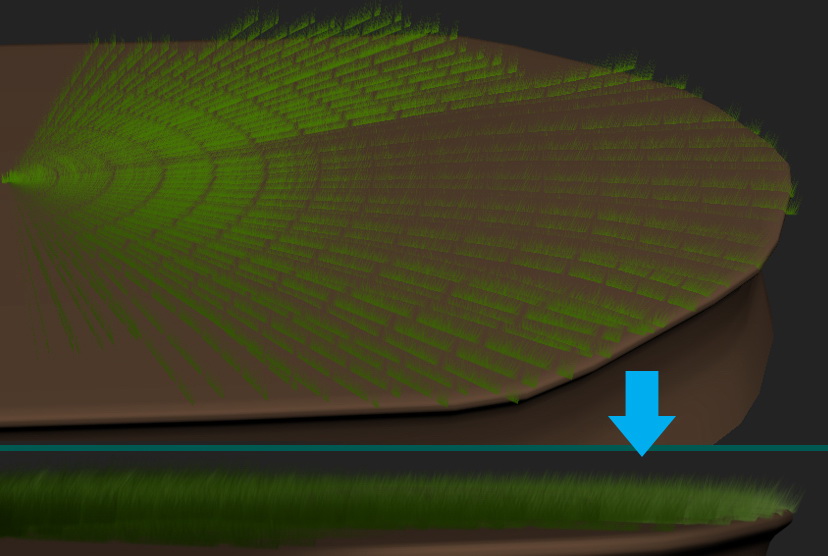
Arrange the “planes” in picturesque disordered sector, and grassland appears when the camera is shifted to the angle near straight.
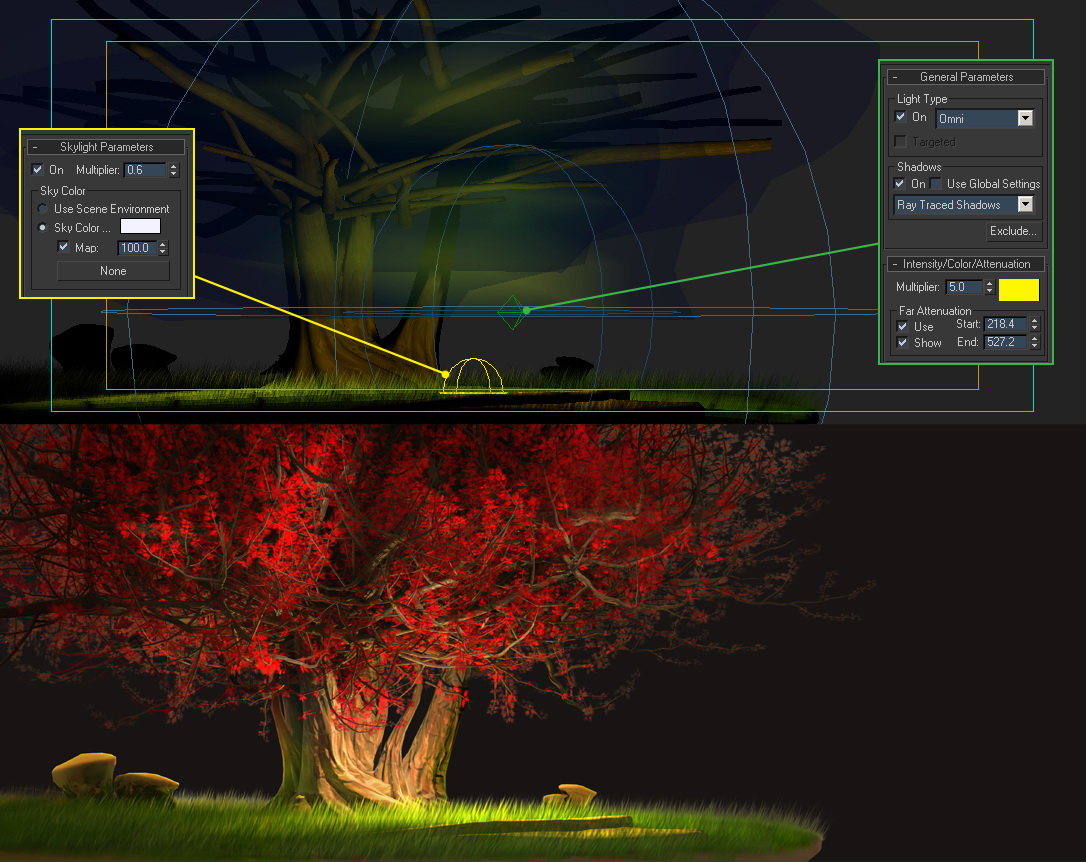
Add some stones on the earth table, to make the image richer, set up Omni at root as the main light source, and set up Skylight as the secondary light source. Select Mental Ray, open global lighting, and render to get effect as above.
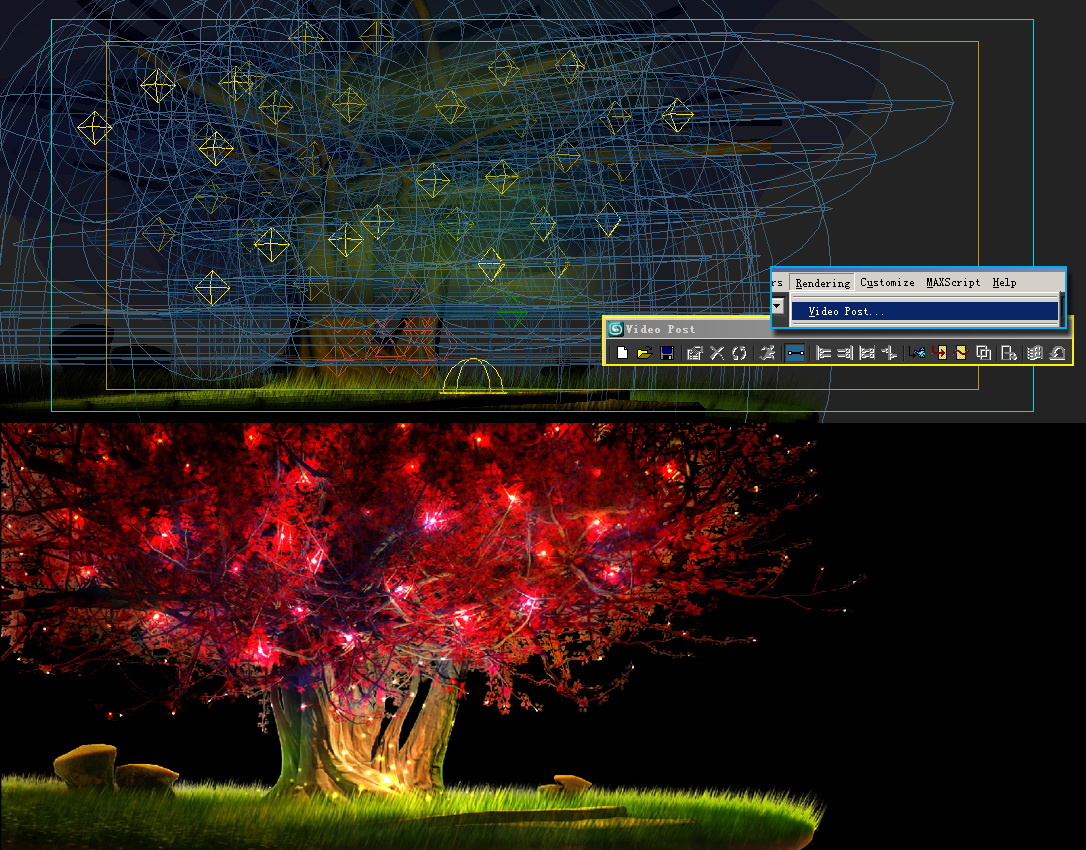
Add special light effect (to represent the rise of bright light), we can use Omni with suitable light scope and Video Post to achieve such effect, or add in anaphase, which will be more convenient.
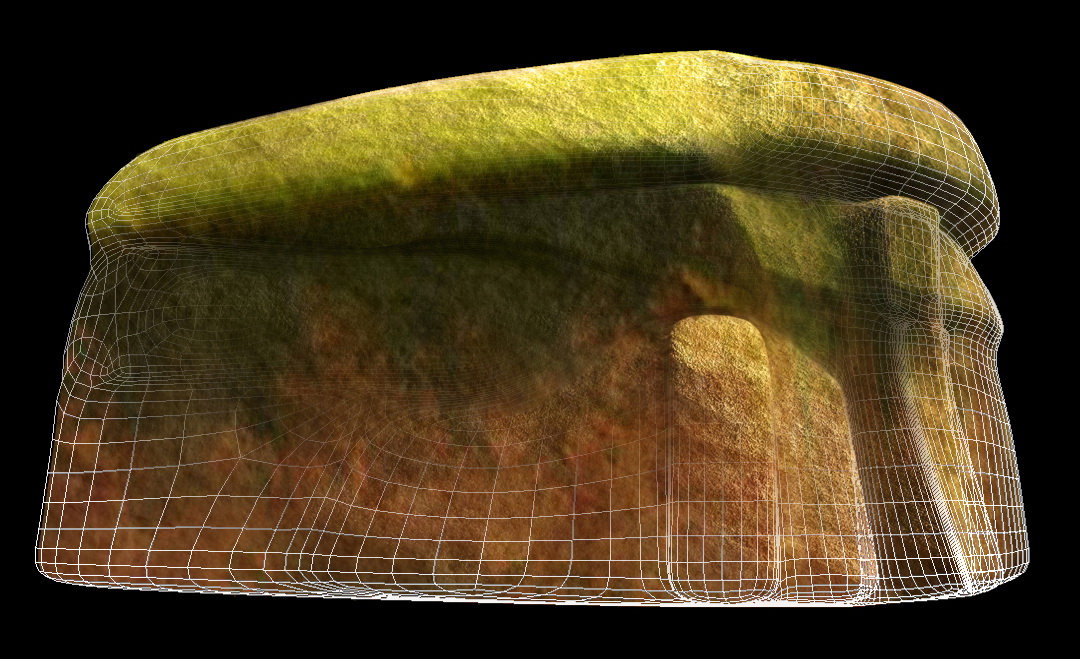
Make background elements: as they are elements besides the main body “tree”, it is unnecessary to make them highly detailed, or otherwise, they will surplus the role of the main body, and only become a waste of energy. Take stones in above image as an example, both shape and structure of the stones are simple and clear.

The whole image consists of four parts: the first part is foreground, the second part is medium shot, third part is mist layer, and fourth part is background in distance. [While making overall scene, it is unnecessary to build the overall scene according to real scale, it will be too large then, we can build “large” scene in “small” area if we have concept of the whole, and abide by the perspective principle of “the nearer the larger, the further the smaller”.]
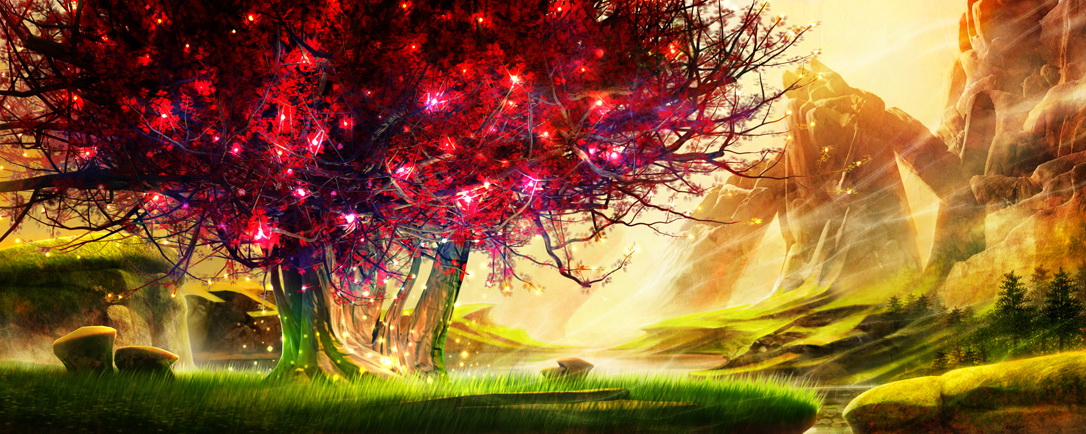
As is shown above in these two images: the mountain is not very far away, but it is scaled down to be very small, so when it is adjusted to camera angle, the simulated perspective effect is achieved.
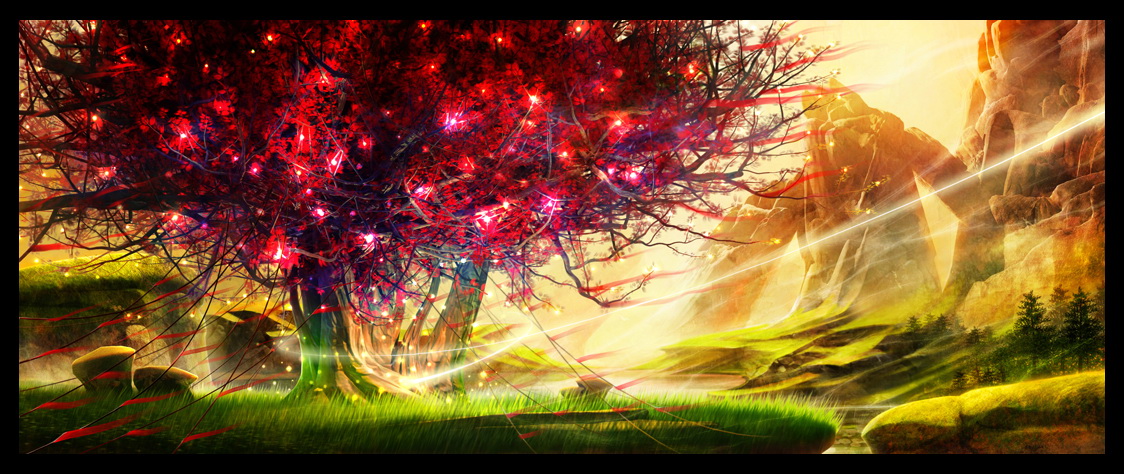
Add some atmosphere effect at last, and the work “Joy Tree” is completed.
I make a fairly complete work with the basic functions of MAX, it has improved that software is just the tool, while artist’s original idea is the source of art creation. “Skillful control and artistic apperception” could make work more beautiful, but are not “preconditions” for “creating a work”.
Technical content of this tutorial is not high, but I hope I could convey a concept to you through creation process of the work.


3d max
really awesome … need any system requirement ??
Nice but only for experts ! beginners had no chance with this tutorial …. I can follow but my tree is not even close to this tree …
Best Regards
1 no
nice man i like u r tutorial i try 2 time but i can’t get that much quality
FANTASTICCCCCCCCCCCCCCC
UWaaaaaaaaaaaaa~~~~.
PERFECTtttt~~~~~
it 2good.
i am a beginer please give simple design to me
that’s good the design image in this program
My regards
Hi, this is an answer from author: “magic tube tool” is term to describe the shape of the “iron”, the purpose is to help readers to find the iron easily, while the official name of the iron is “show map in viewport”. There is some misunderstanding in the translation. Sorry if that caused the confusion.
Looks fantastic but I cant folow the directions. What is magic tube?
Needs more detail in discriptions