“It comes time of death” by Radoslav Zilinsky
Hi, my name is Radoslav Zilinsky and my Internet nickname is radoxist. In this article, I would like to present to you the process of making my picture “It comes a time of death”.
I’m going to tell you how I proceeded with the creation, modelling, texturing and composition. I will also pay a closer attention to some details which I find interesting.
One of the most important things for me is, to have a good foundation, on which I can base my image. As an inspiration could serve a photo, nice picture or my own sketch. In this case, I was inspired by a small cover picture from one of the RUNELORDS series book.
So let’s begin with the creation of the picture. My very first step during the creation was:1.Camera placement 2.Modelling of basic composition(mass) 3.Scene lightning. I find it very important to have this three steps at the beginning. It is something like making foundations for a scene. It is important, because everything that follows, will be affected by lightning and camera placement. It basically means that from now on, I can model and design materials for exact camera view and lightning. At this phase, I don’t care how the model looks when I’m rotating it in the viewport, but I put more emphasis on how it looks from my camera view. The same applies to material design. Now it’s time to show you, how the picture looks in the first phase.
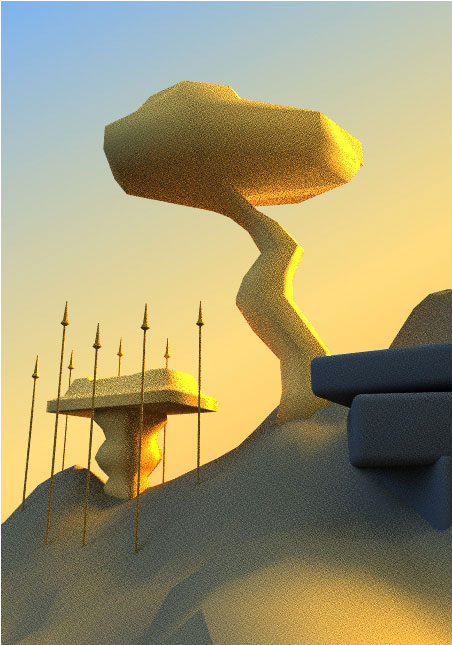
As you can see, the mass and the objects are only roughly modelled, but they are good enough to set 80% of the final lighting. Basically, there are three lights in the scene – on the right side there is one small rectangular light with orange colour and higher intensity and another much bigger light with blue colour and lower intensity on the left. The third sky dome light of red colour and lower intensity is oriented from right to left and its purpose is to add an extra colour variation to the picture. From now on, I will not move the camera at all.
At this point, I would like to talk about the chosen renderer and the method of rendering.
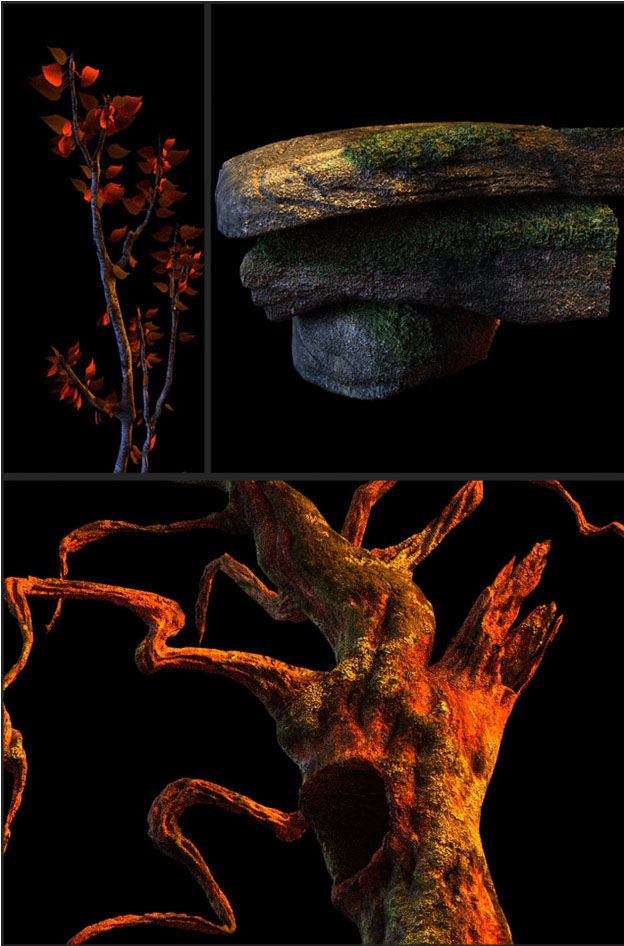
As for the rendering, I have used Vray renderer and as a method progressive path tracing (PPT), which was ideal for this picture. The reason for this is that in the scene there are many objects with Vray displacement, and this method handles them very good, especially in combination with object isolation (alt+Q). As a result, material testing was very fast. As an illustration, I rendered three pictures (tests). All of them were done in 4-5 minutes (and already in the first minute I could see most of the details), which is a very good result especially when talking about rocks and trees taking into consideration their detailed displacement. The rendering was with “Normal” Vray GI method (other than PPT), for example IRR + light cache, would take much longer than PPT. Here are the above mentioned test pictures.


Latest Comments