
Hello friends! Oasis here to do a little tutorial about how to map out the body! This is a helpful little tut that will help you know how best to structure the body when you’re drawing a picture, so, hang on!
Step 1 –
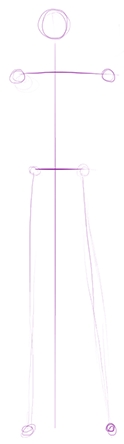
Okay, so first of all, let’s put where the head is. Now the circle at this point, doesn’t have to be the size of the body, it’s just to say “this is where the head goes”, lol.
The first line we draw is going to be the figures balance center of gravity. This line is Important as it makes the figure natural- if you don’t know how the balance is, then the figure won’t look like he’s natural.

Step 2
So next, “map” out where the shoulders are, the hips and the feet. This is going to be a stadic pose. You should know how to fill in the available space you’re drawing within.
Since this square is only one size, I’m showing how to use it all. This is the first part of the map. This can change dramatically with how you’re posing your figure. So this is just basics.

Step 3
Now just add in where the shoulders would be, then the top part of the hips as well as the line of the legs.
This is not in proportion just yet, but that’s not quite covered in this tutorial.
Step 4
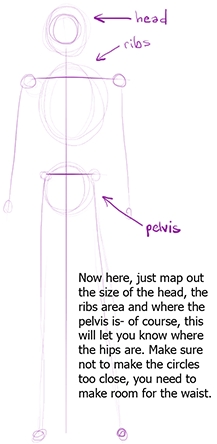
Now here, just map out the size of the head, the ribs area and where the pelvis os- of course, this will let you know where the hips are. Make sure not to make the circles too close, you need to make room for the waist.
Step 5
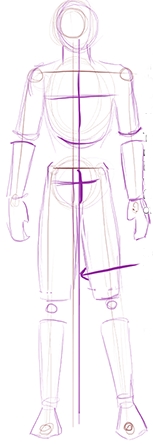
Now, just map out the rest of the body – the arms, the legs, the ribs and so forth. Just build on from there.
This is the full mapping of the body that you will build your final picture off of.
the balance line was off, so I redrew it here so to make sure he’s balanced properly.
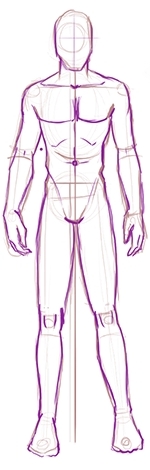
Step 6
Now we map out more of the body by putting in the rest of the details. This is still basic stuff, like the arms, legs shape, putting in where the hands are, the ankles, the collarbone… and all of that =)
Step 7
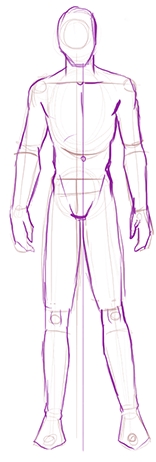
Then, basically you start working on refining the details. You do this as many times as you need before you get to the finished product and then you can line!
Remember, nothing is final- you can tweak and change and work with it until you’ve got it to the point of perfection!
I haven’t gone into proportion in this tutorial, that is a whole other venue. So we’ll leave it there!
Just remember to map out what you’re drawing with sort of a “skel-eton” and build from there. Hoping this was somewhat helpful.
Thanks for reading!! Good luck and good arting!
=D
To get texture of human body, we recommend visiting human-anatomy-for-artist site.


Latest Comments