“Hair” by Raffael Dickreuter
In this tutorial you will learn how to use curves as guides to create long hair.
3Dtutorials.sk recommendation:
To maximise the realism of your 3D characters we recommend to use high quality human photo textures from the #1 texture website www.3D.sk
Load your head object or get a head primitive Get > Primitive > Model > Face – Woman or ManIn the Model Panel Curve > Draw CV NURBS. We will use curves as guides. As shown in the image on the left simply draw a curve that moves along the skull and has the shape you want. 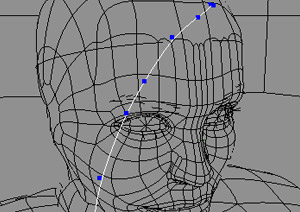 Make sure that you add enough points, the more points you have the more control and it will become way easier to get smooth hair. Be sure that the hair starts inside the head and does not stand away from the actual shape.
 If you are happy with your first guide duplicate it (ctrl + d) and move it backwards and a bit upwards. Always check if the curves follow the head, if not move some points of the curves. Duplicate it a few more times.
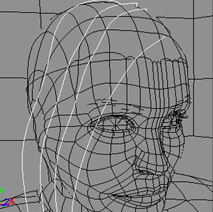
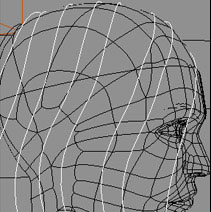 Now you need to understand how the hair is populated along the guides, if two guides are closer together, more hair will be displayed.
 Now le’ts add some hair to the guides: Select all curves, Ctrl + 4 and Create > Hair > From Curves.
 You might see that the hair doesn’t follow exactly the guides, in order to improve that we have to increase the amount of hair segments, depending on the length of the hair. Type in 50.
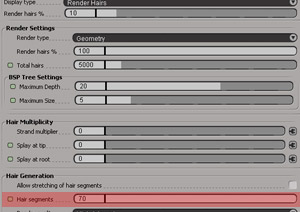 If you work a lot with hair you might often want so switch between the “guide view” and the “render hair view”. I created an addon for this. Drag and drop it into your viewport: Hair Display Type Addon. You might want to assign it to a key or integrate the button into the hair panel (see left image), whatever you like best.
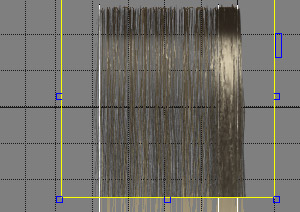
 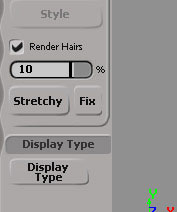 Now change the display mode to Render Hairs Note that render hair mode might slow donw interaction, but we need is for a preview. If you draw a render region your hair might appear pretty think, we can decreate the hair thinkness to get a more natural look. Compare the two images below. The first image has a thinkness of 1, the second of 0.3 for the root and 0.2 for the tip.
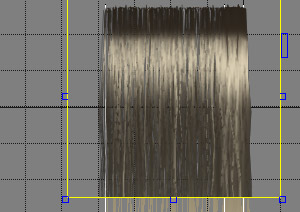
 Select the hair-spline object and in the hair panel go to the “Presets” tab and try out the different presets. You can see some diffent styles of hair.
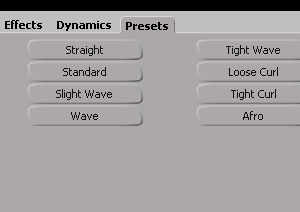 With the hair selected click “modify > shader” in your left hair panel. Go to the Render Settings tab and set the diffuse model to “long hair”.
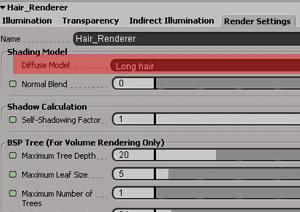 In the local netview under Library > render > hair you will find color presets that can get you a good start for getting a certain hair color. Just drag the presets from the thumbnail over to the hair.
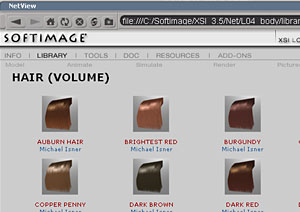
(c) Raffael Dickreuter, raffael3d@raffael3d.com


Latest Comments