
 gmail.com
A person who loves drawing (since she was 3 years old). Her unique style of traditional anime drawings have made her artwork instantly recognisable. Favourite tools: Colour and mechanical pencil.
This s a tutorial of how I coloured the hair, and you can see the finish picture at the bottom of the tutorial. Based on this you can create another colours of hair by just simply follow this tutorial 🙂 You can use some colours tones as: green, yellow, brown – pink, purple, light purple or dark pink – brown, yellow, gold etc,…they are what I usually use. I apologise for the quality of the pictures, they look quite blur cause I took it from camera (scanner was crazy) Hope you don’t mind that. I have used colour pencils (Faber Castell). Thanks a lot for reading and have a nice day.
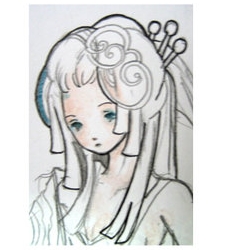
1.Linea art
Repair your hair line art first which in pencil(I just wanna to remind that cause we are working on hair’s colouring now 8))
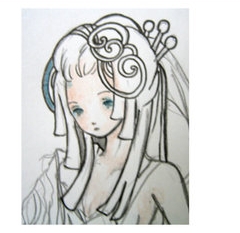
2.Pen
I used Micro Pigment ink 01mm for draw main line art(You can use 0.5mm or 0.25 will be better if you drawing is small)

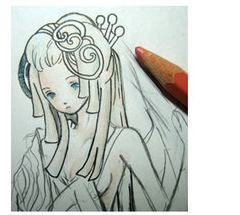
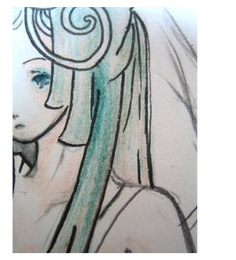
3. Finish lineart
After finish it with ink, it will turn out like this 😉
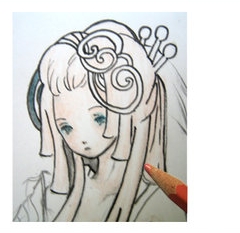
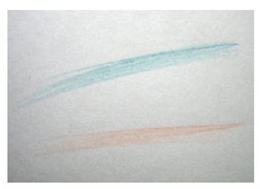
4. Using bright brown
Yes, I used bright brown(lightsalmon) colour pencil as 1st. colour to cover all of her hair.
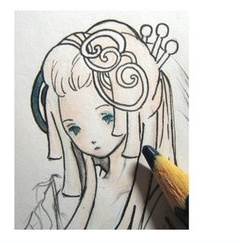
5. Using dark blue:
Now we use dark blue pencil(actually it’s teal but I call it dark blue so it will easier to remember) and colouring the picture softly.
6. Bright brown again
I used bright brown again(colour it softly again). Don’t worry, it’s not a wasting step, it makes it will look better later on.
7. How to colour:
This is how I use colour pencils, 1st. for lineart, 2nd. for soft colours, 3rd&4th for blend, strong, dark colours.
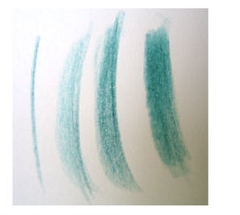
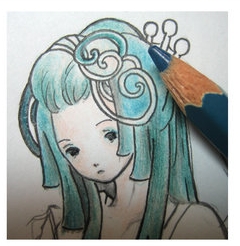
8. Soft colours:
I coloured hair with softly line those 2 colours(dark blue&bright brown. I coloured it softly that’s why you can see blue s quite bright)
9. Finish step 6:
Yep, now back to step 6 after finish it so the result will be like this. (And I want to apologize that I use camera to take all photos so that’s why they look blur and sometimes colours are different between each picture)
10. Using dark blue again
Now we will use the colour pencil which u used just now(at step 5) You should colours it softly till it looks more blue(don’t be lazy by press the colour pencil, it may fastter but the result will bad and paper will have crease which will turn out very clearly after scan)
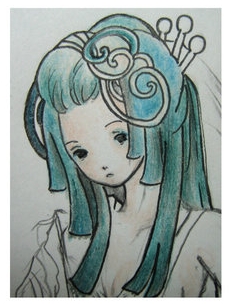
11. Finish dark blue
It will look like this after you finish step 10 . Be patience it will be finish soon.

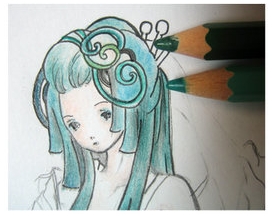
12. Another blue
Now you pick up another dark blue but it MUST BE lighter than the dark colour pencil blue just now which we used from step 5 to 11. It may brightter than 1 or 2 tones.
13. Finish step 12:
After done that, it will look like this. Yay, you r coming to finish it 😀
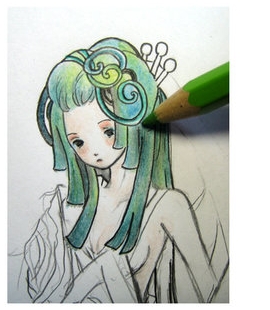
14. Want more effect?
Pick up 1 brightter blue/aqua(lighter than 1 tone) and 1 dark green&softly colour somepart which you want more effect only( dont put to much)
15. Green added:
Use light green to add more effect so it will look better.
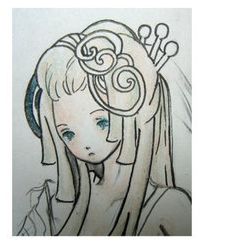
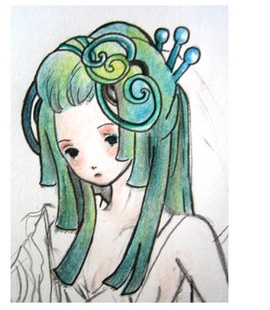
16. Finish:
Yes, take a deep breath and smile. You have just done the hair’s colouring. YAY
This is a part which I cut of from Chally :D. Hope it can help and thanks a lot for reading.
Have a nice day.
To get more texture for Fantasy Forest, we recommend visiting environment-textures.com site.


Latest Comments