“Creating game character – part 3” by Les Padrew
Starting the Model
A good way to create models in 3ds Max is to start with a primitive object and build by modifying the object. You will start this model with just one primitive object,a box.This is only one of many approaches for building models.There are almost as man y ways to build a model as there are modelers. In this example,you will only be creating half of the model and then mirroring it to get the other half.
3Dtutorials.sk recommendation:
To maximise the realism of your 3D characters we recommend to use high quality human photo references from the #1 reference website www.3D.sk
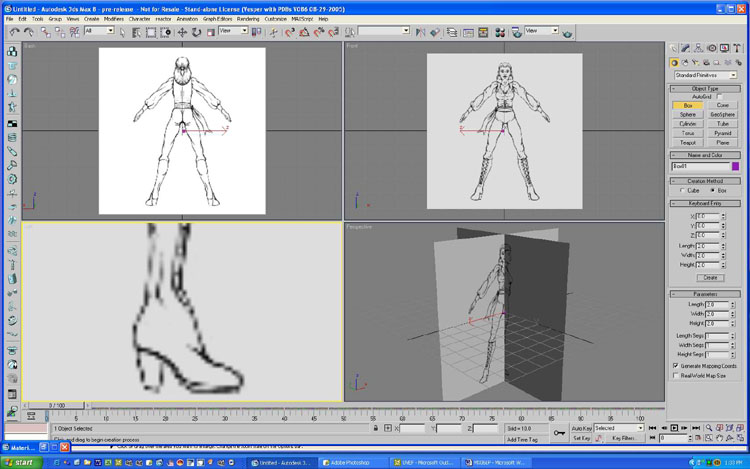
1. Create a box with the following attributes (see Figure 6.23).
Length: 2.0
Width: 2.0
Height: 2.0
Length Segs: 1
Width Segs: 1
Height Segs: 1
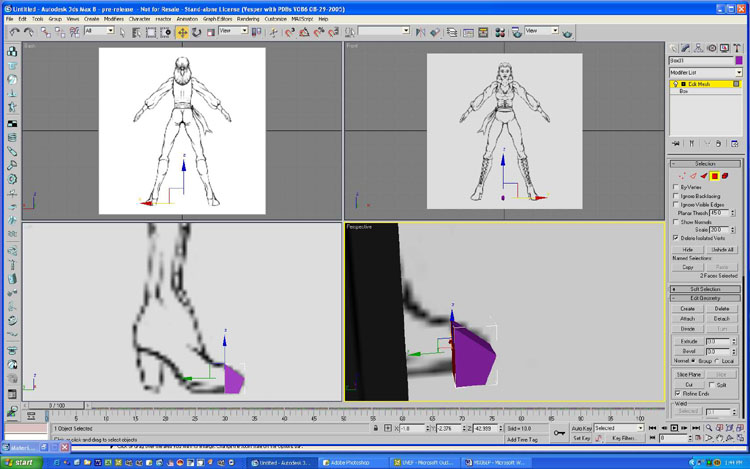
2. Now you need to convert the object to an Editable Mesh.Click on the Modify tab,represented by the icon that looks like a bent pipe.Changing the object to Editable Mesh makes the object editable so you can build with it.
3. Make sure the box is selected,and then click on Edit Mesh from the Modifier List pull-down menu.
4. Now click on Vertex in the Selection rollout.This puts the mesh in Subobject mode.Move the vertices of the box to line up with the toe of the boot,as shown in 24.
5. Right-clicking on the object will bring up a quadmenu.In the lower-right portion of the menu,click on Properties.This will bring up the Object Properties dialog box,shown in 25.

6. From this small box at the toe of the character you will be extruding the entire character model.To see what you are doing,turn on the See-Through option in the Object Properties dialog box.
7. Change the selection mode to Polygon by clicking on the red square in the Selection rollout.
8. First you will be extruding the boot.Select the polygon facing the inside of the boot,and then click on Extrude in the Edit Geometry rollout.
9. To extrude the polygon,place the cursor over the selected polygon in one of the viewports and watch for the cursor to change into the extrude cursor gizmo.Now click on the polygon and drag up to extrude out and down to extrude in.You will want to extrude the polygon toward the back of the boot.
Extrude the polygon until it lines up with the ball of the charactes foot. 10. Now adjust the vertices to follow the contour of the boot in the Side view.
11. Continue to extrude and adjust vertices going up the boot.You will need to do this several times to follow the contour of the boot (see Figure 26)


Latest Comments