Step 1
Fill your background layer with the color #c99e7e (a light brown). Then make a new layer above and draw the basic lineart of your lips using a darker brown and the hard round airbrush. You can use references if you need and shouldn’t be too picky about the lineart, as it will be covered later.


Step 2
Now make a new layer between your lineart and background. Using a big soft round airbrush block in the basic shadows of the skin. The natural skin-shades have a dark brownish-red tone. Also draw some first lights using the same brush. Pick a more yellowish, brighter brown for the lights. Try to get smooth transitions by painting gently and softly.


Step 3
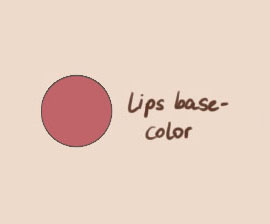
On a new layer block in the basic color for the lips, which is a fleshy red/pink. Basic colors shouldn’t be too saturated or too bright, they only serve as a base for the shadows/lights and detail we will add later.


Step 4
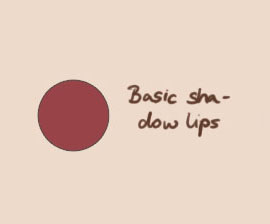
On the “lips-layer” add the first shadows by using the soft round airbrush. The upper lip is usually covered in shadow, so choose a darker red/purple and fill the whole upper lip with a plain shadow. Also add first shadows to the lower lip to define its plasticity and shape.


Step 5
Still on the same layer choose an even darker red/purple and paint in the shadows where both lips touch each other. This part is usually the darkest part. Go on defining the lower lip and look how the upper lip casts a shadow on the lower one.

Step 6
Still on the same layer, draw the little light-dot next to the pupil, using white or a very bright cyan. I drew two of them to give the eye more depth. Also I lowered the opacity of my lineart layer from 100% to about 60% as we are going to cover the lineart in the next step.


Step 7
On the “lips-layer” add first lights still using the soft round airbrush. Usually the brightest part is the center of the lower lip. But there is also light on the part of the upper lip, where it blends into the skin. As a light-color I usually pick the base color and make it brighter plus more yellowish. This is due to the sunlight, which has a yellow, warm tone.


Step 8
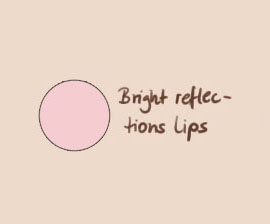
Now let’s use the hard round airbrush. Pick a bright pink and paint the reflections of the light on the lower lip. Don’t use a brush size, which is too small, as this is only the base for the highlights, which will follow later. Also add first light to the spot, where the upper lip blends into the skin (on the skin-layer).

Step 9
Choose the lineart layer and reduce its opacity from 100% to 50%. In the next step you will cover the lineart. This will increase the realism.

Step 10
Now make a new layer above all your layers and, using both airbrushes, paint over the lineart. Do that gently and with soft strokes. Also use the color picker when needed and add more lights/shadows.

Step 11
Make a new layer and draw first detail and highlights on the lips. Use the hard round airbrush and a small brush size. Add folds and surface irregularities to make the lips look more lifelike. Don’t be afraid to use references!

Step 12
We are nearly done! Still using the hard round airbrush also add detail and highlights to the skin surrounding the lips. You can draw some pores/folds and also some moles if you want. Paint even lighter spots into the light reflections on the lower lip. You can also use custom brushes or textures to get the skin look real.

Step 13
In the last step let’s add some more depth and dynamic to the image. Make a new layer and set it to “Overlay”. Then, using a big soft round airbrush, add some color to the lights and shadows (yellow/orange to the lights and blue/purple to the shades). Then make some contrast and color corrections. Add a sharpen filter (Filter>Sharpen>Sharpen) and you are done!

Here are some other useful tips on how to draw various lips:

You can check also a tutorial on how to draw fantasy eyes.


 web.de


great work done!!
even i want to learn such stuffs
have u done it form this site only??