“The Explorer” by Monsit Jangariyawong
I started sketch with pen and paper , I tried to draw little thumbnail as much as possible to find the right composition , I spent mech time at this stage, because , if you find the right compostion at fist ,it will save you a lot of work. Finally I picked the one I liked and developed it into high resolution image. At this point I begun to add detail to my ship, monster, pilot design and used it as reference in modeling stage.
 I used image from step 1 for modeling reference ,I locked the camera position at this stage and found the lense that suited my compositon. After the camera work was completed I begun to model each of my element piece by piece .
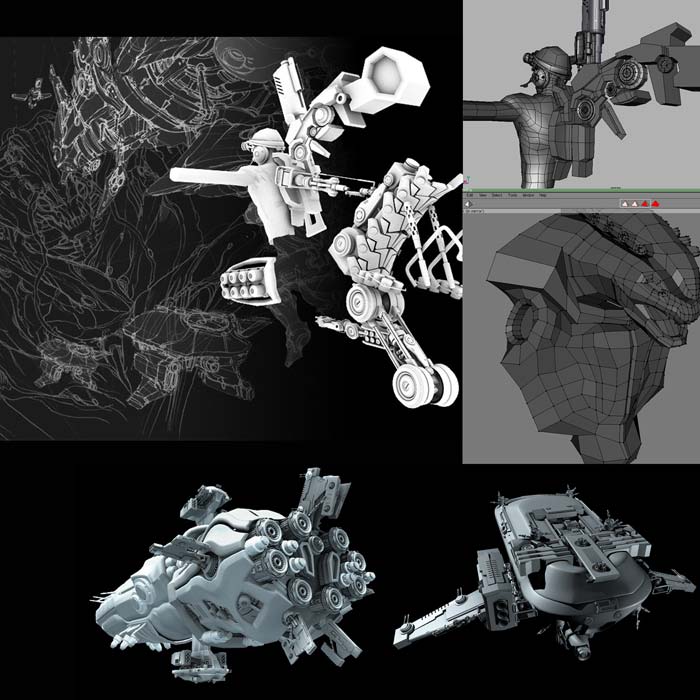
My modeling tool is wings3d and Alias maya. I used box modeling technic for my main element such as pilot, space ship and alien and finish UVmapping in wings3d. It had great feature to make my task easier. For the detail model such as gun , mechanic part , I used nurb surface in maya because my gun design is easy to use nurb modeling method.

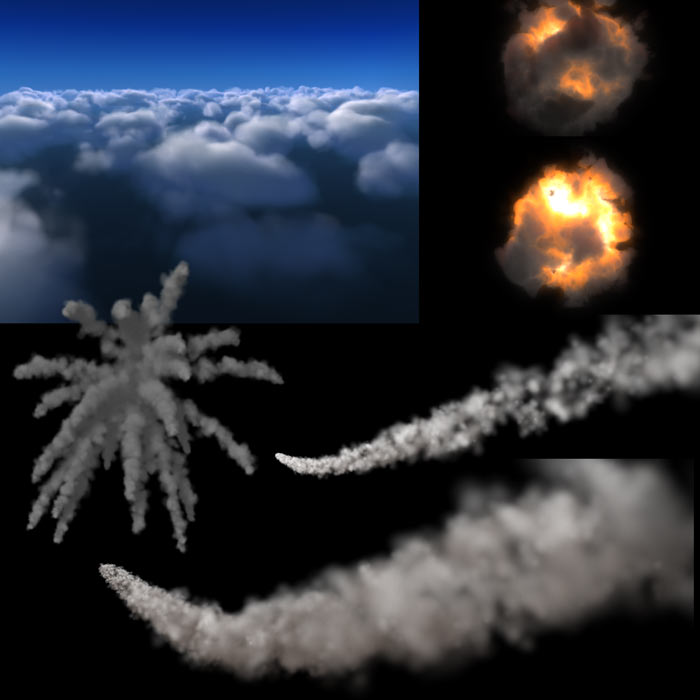
I decided to give my scene happen in daytime. At the big area of grand-canyon-, I was inspired by starwars desert planet, the terrain was entirely made with flat nurb patch. I used high resolution displacement map to generate the high of terrain in combination with bump map. I could see the displacement preview in viewport by using of hightfield utility node in maya. Final image was rendered with mentalray.

3Dtutorials.sk recommendation:
To maximise the realism of your 3D rendering we recommend to use high quality photo textures from the #1 texture websites www.environment-textures.com and www.3D.sk
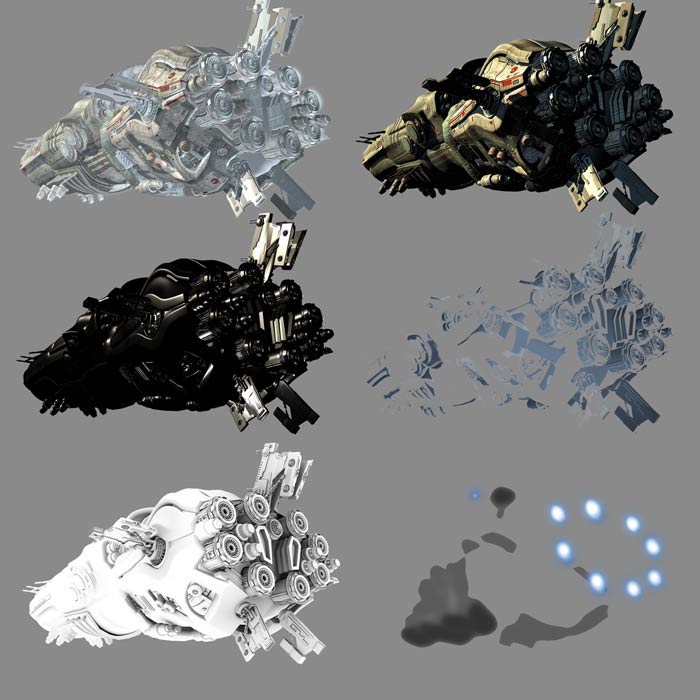
Texture work was painted by hand in adobe photoshop. The resolution is pretty high about 4096×4096 . Reflection map was made by render terrain scene environment.

Progression of my texture work , at this point I begun lighting work. I used Dome light script for GI ambient atmostphere light. After I finished lighting, I begun to fine tune my texture. I wanted my model to look old as it was used for a long time so I added more dirt to texture map. Alien shader used subsurface scattering in maya to acheive the creature-skin look.

Spaceship was rendered in multi-pass method. I seperated it in several parts:1.color with ambient light pass, 2.sun light diffuse pass. 3. specular pass 4.shadow pass. 5.ambient-occlusion pass,6.effect pass. with this method. I had more freedom to fine tune it without rerender.
Main element of image the pilot was made by the same technics and concept with spaceship but needed more details. At this stage I begun to combine all element to see the overall composition.

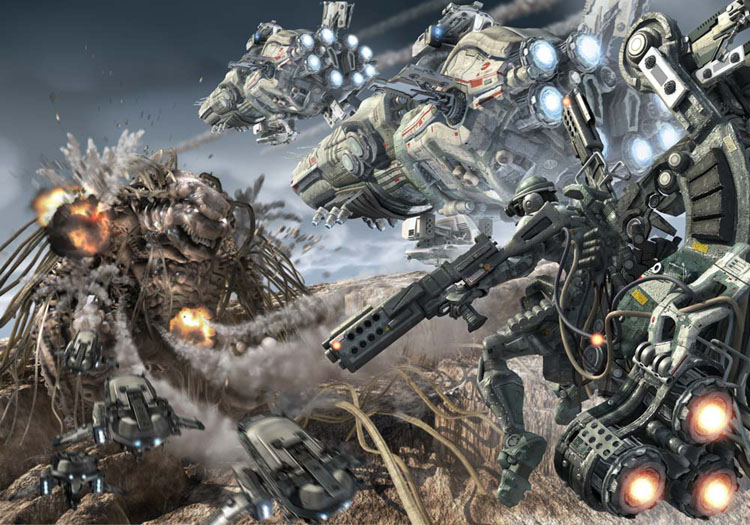
Lighting and texturing was done. I begun to experiment with the final composition. I put my rendered element in differnt position, sit back and post my experiment in forum and recieved many valuable comments. Finally I decided to follow my old composition . At this point I used photoshop to desaturate my render into mono-tone image to “seperate” value and add depth to my image.

I used maya fluid effect for sky explosion and missle trails.
I composited all elements with adobe photoshop, desaturated, blur, I added glow effect, paint fog to seperate my element. With my greyscale reference from my earlier step, I adjusted contrast and value of pilot to seperate it from the spaceship .

I begun to fine tune all detail point, retouche some problem spots and I used photoshop’s liquify to add “heat wave”effect to spaceship jet. Finally it was done!
(c) Monsit Jangariyawong, monsitj@hotmail.com


Latest Comments