“Bruttus 4Z ” by Joao Milando
My name is Joao Milando. I was born in Cabinda ( Angola , Africa ) in 1986.
I’m currently living in Portugal just for study business and while living here I see things that I’ve never seen in my hometown.
My CG adventures started years ago (in 1998) after reading an articles that told me how Tomb Raider was created. That was when I started to browse at the internet to learn more about Cg and, here am I right now.
It was difficult to me to learn how to use MAX because my English was not that good and still not but I finally made it and started to model cars to start. I’ve tried character modeling before but concept cars are what I like to model most.
Enough talking and let’s move on.
Drawing and sketches
Most of you may already know that some sketches are vital for a modeler when it comes to model a concept car, not only in cars but for everything else.
I made some sketches for some of my concepts and others not because I used other cars as reference.
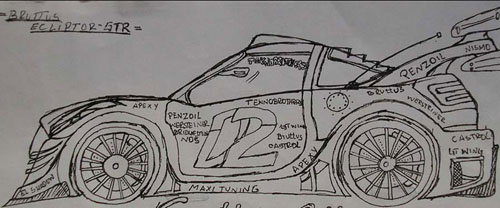
The car that we’re talking about, in this article, is based on the marvelous and beautiful Mazda RX-8 as you may already noticed. I chose to base this one in RX-8 but I could’ve done sketches instead.
Normally, I only create a picture of the side of the car because, to me, that’s what decides how the car will look.
When modeling/painting a concept car, we must be careful on two things: Style and Aerodynamics.
Why ? style ?? Well, I’m still learning about concepts but in what I know until here is that we must not draw the car just by drawing. We must idealize how it will be in the society and how the society will live with that car (for designers and engineers). A stylish car gets all the attention when it appears in a place full of citizens and by getting all the attentions, some citizens can be interested on it and this interest will be advantageous for the company.
Now, ? style ? isn’t everything! When we think about style we must also think about Aerodynamics . I don’t know much about aerodynamics but I’ll try to transmit you what I know. I can be wrong! Correct me if that happens.
I love to put some spoilers in the car but, there are some cars that have enough aerodynamics on it without spoiler. Some people think that a spoiler is put in a car to give style. That’s not the only thing! A spoiler also increases aerodynamics on a car that keeps it stable at high speed.
Are you thinking that the spoiler is the only thing that gives aerodynamics on the car!? Yes? You’re wrong! The car’s body also has influence on the aerodynamics. That’s why I said ?we must not draw the car just by drawing?.
Here are two sketches of some of my future projects.

Modeling
This is the part that I most like.
One of most important things is to have fun and I have fun modeling my cars .
Note that you must be totally interested in your project in order to get it the way you want.
Most of you ask me what method do I use or what method is the best. Well my answer simple, ? Try as many method as you can and then, choose witch one of them is suitable for you .?
I use ? Poly Modeling . That’s the method that best suits to me.
I’ve tried ? Spline Modeling ?, ? NURMBS Modeling ?, ? Box Modeling ? and ? Poly/Spline Modeling ?.
The last method consists in combining ? Spline and Poly Modeling ?. I use that method sometimes to first create the basic shape of an object and then convert it to editable poly to add the details. How or from where do we start modeling the car!? The answer is simple too, ? You decide where to start. Choose a random part to start, and then watch out for the results .?
I, personally, prefer to start from the hood. I always start from the hood.
I also tried to start from the roof. That’s a great way too. I fully advise beginners to start from the roof and change to any other part later.
Hint : Modeling the exterior (body) is the easiest part. Modeling other parts such as engine and interior is more challenging and also increases your modeling technique faster. So, always try to model everything! Try modeling the main body, engine, interior, trunk and suspensions.
Also, this is very important, model the car in different objects, that is, each part of the car should be a single piece.
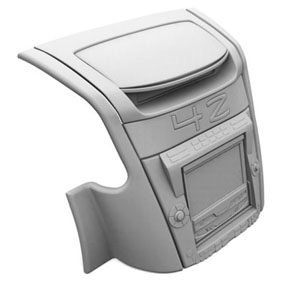
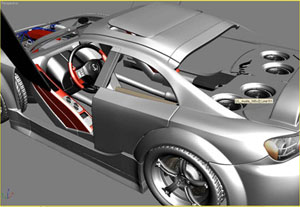
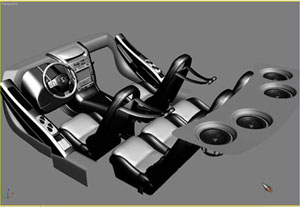
Here are some shots of the progress of the Bruttus 4Z:
Exterior:


Interior:


Final wire frame:

Rendering
Well, well, well… The rendering process!
I use Brazil Rendering System for the renderings.
I’ve used VRay once but I switched to Brazil because VRay is full of errors.
I don’t use HDR maps for the rendering, yet because I love studio renderings.
I plan to make some environmental renderings later after learning enough about environmental renderings. Right now, I almost don’t know anything about it because I still don’t know to relate illumination and objects with environment.
I’m currently working on that.
3Dtutorials.sk recommendation:
To maximise the realism of your 3D rendering we recommend to use high quality photo textures from the #1 texture website www.environment-textures.com
Materials:
Main Body
For the main body I use ? Brazil Basic Material ? with Fallof Map with Freshnel effect on the reflection slot, since ? Brazil Advanced Material ? is not that good.
With Brazil Basic Material , I can control the glossiness and Specular. With Brazil Advanced Material , even by setting them up, the main body of the car always comes out overglow.
For chameleon painting you can use gradient ramp map on the diffuse slot or in the reflect slot.
Play around with your materials in order to get your desired effect.


Glass
For the glass, I used Brazil Glass with default settings.
Notice: Make sure your windows are a box, that is, make sure your windows are two sided because if you put a plane as windows, you’ll get a window with too much glossiness.
Rims
There are several ways to show your rims. You can chrome and or color them.
So, use your imagination. I normally chrome them.
For the Chrome material, use Brazil Chrome with default settings. That should do it.
On the 4Z Concept rims, I black colored them and added a red ribbon to give more stylish look.
I advise you to play around with the settings in order to get better results.
The rendering settings are easy here are some pictures on how I set up my scene:

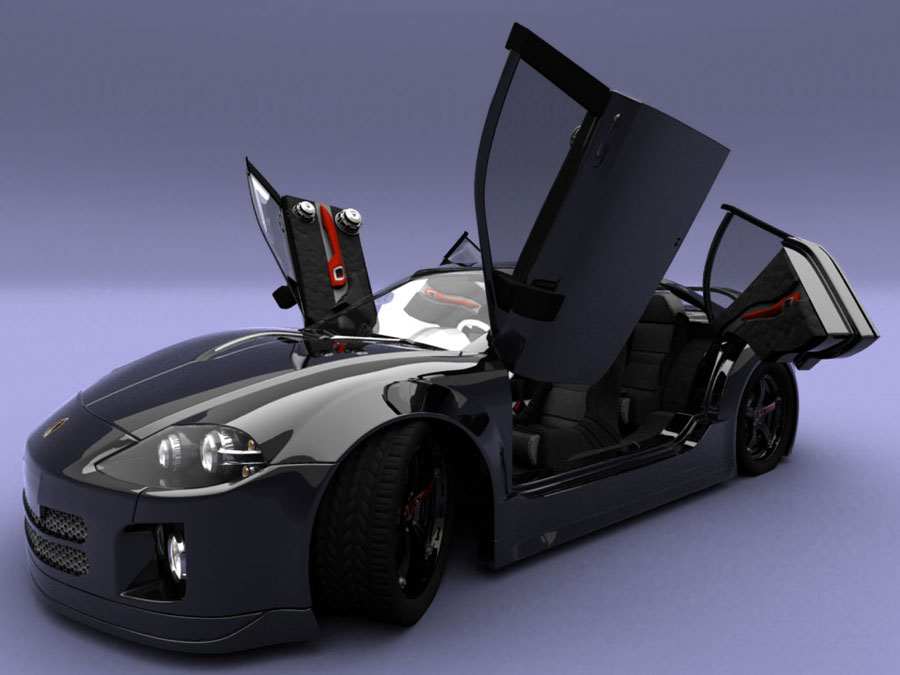
At the end, after setting all up, make a nice shot of your car in you preferred POV (Point Of View) and show it to us. Here are some of my favorites rendering POVs.
That’s it! I hope you learned something from this overview.
This was my first overview and I did my best to explain things.
I’ll see you around.


(c)Joao Milando, ShadowKeeper


Hola! I’ve been following your website for a while now and finally got the courage to go ahead and give you a shout out from Lubbock Texas! Just wanted to say keep up the excellent job!
really nice……. excellent work 🙂