"Aus dem Leben eines Taugenichts" by Gino Caspari
In this tutorial I am going to explain how I created composition, texture and light of the painting Aus dem Leben eines Taugenichts in Photoshop .
First I made a simple and rough sketch in which the path that the eye should be lead was defined. I wanted the viewers eyes to follow a real path which was emphasised by the curves along the way and the composition of the groups of trees nearby. It is really important to have a good sketch before you begin painting anything because it saves a great amount of time.

After having digitalised the sketch, I began to paint it on a dark brown background with a simple hard-edged brush. When e.g. the
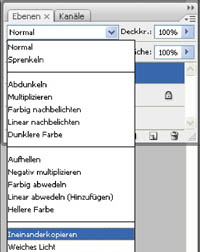
tree looked like I wanted it to be, I started to add textures from photographs to make the ‚flat‘ digital colours a bit more vivid. For
adding textures mainly the multiplying mode was used. Then I repainted the structures again, adding highlights and depth. (To paint the leaves and the moss I used custom brushes which I created from photographs.) You can repeate this process as many times as you want, until you are happy with the result.


So I ended up with this. And what was left to do was the lightening. First the corners of the painting were darkened, then I painted lights on the leaves of the great tree, on the clothes of the sleeper and on the grass around him with a strong yellow. Afterwards the ground was lit in a blendmode.
3Dtutorials.sk recommendation:
To maximise the realism of your CG projects we recommend using high quality photos from the #1 texture website www.environment-textures.com


Pages: 1 2


Latest Comments