“Angie – 3D Photorealism Portrait Tutorials & Digital Art Lessons – Part 6 ” by Ralph Manis
Post production work in Photoshop… Painting realistic hair details and final touch ups
3Dtutorials.sk recommendation:
To maximise the realism of your CG character we recommend using high quality photo references from the #1 reference website www.female-anatomy-for-artist.com
Painting the Hair
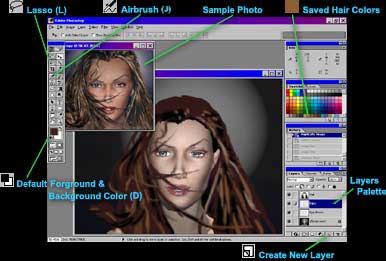
Painting hair tools. (Letters in parenthesis are keyboard shortcuts that select a tool.)
• Tip: In art, there are no rules! Using photographs as references is not against the rules… It’s a necessity!
1. Open Photoshop then: File > Open or (Ctrl+O) > Select your rendered file.
2. Click New Layer button ![]() on the bottom of the layers palette then double click the text in the layer and rename the layer “hair” and hit Enter.
on the bottom of the layers palette then double click the text in the layer and rename the layer “hair” and hit Enter.
3. Press (Ctrl+0) (that’s Control + Zero) to view full screen. Select the “Lasso” ![]() (L) and roughly outline the main structure of your hair. Click the background color and in the color picker pop up select a dark brown (almost black) color. Press (Ctrl+Backspace) to fill selection.
(L) and roughly outline the main structure of your hair. Click the background color and in the color picker pop up select a dark brown (almost black) color. Press (Ctrl+Backspace) to fill selection.
Selecting and Adjusting Brushes
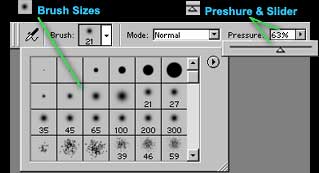
Selecting brush sizes and adjusting pressure.
4. Select the “Airbrush” ![]() (J) and choose a smooth medium brush size
(J) and choose a smooth medium brush size ![]() . Click arrow next to the “Pressure” and move the “Slider” to about 63% or, type in your desired level. Building up hair density, detail and adding a few strays.
. Click arrow next to the “Pressure” and move the “Slider” to about 63% or, type in your desired level. Building up hair density, detail and adding a few strays.
![]()
Quick Rough Med. Brush
Smaller Brush
Small Brush & Pressure at 86%
1 Pixel Brush & Pressure at 100%
Close Up with a couple of 1 pixle stray hairs
![]()
Painting Hair Workflow
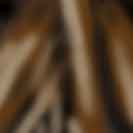
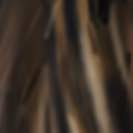
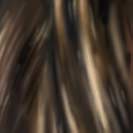
5. Starting with a dark brown, roughly paint the darker area’s. Select a lighter brown and build up around the previous. Choose a reddish dark brown and build up some more. Select a light yellow and apply were necessary. Repeat this process a few times with a few colors but, try not to get to carried away with the details.
![]() 5a. Select a smaller “Smooth Brush”
5a. Select a smaller “Smooth Brush” ![]() from the brushes palette and repeat step 5.
from the brushes palette and repeat step 5.
![]() 5b. Select an even smaller brush
5b. Select an even smaller brush ![]() and turn the “Pressure” up to around 86 repeat step 5.
and turn the “Pressure” up to around 86 repeat step 5.
![]() 5c. Repeat this process a few times selecting a new lighter shade each time.
5c. Repeat this process a few times selecting a new lighter shade each time.
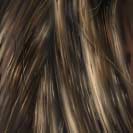
6. Referring to your sample photos roughly add your very darkest areas and your lightest highlights without using black or white. Try to build up your hair in groups of strands, getting smaller as you go.
7. Adding Highlights and Details –
![]() 7a. Press (Ctrl++) (that’s the “Plus” sign) or use the “Magnifying Glass” tool to enlarge your image and select a dark brown (almost black) color
7a. Press (Ctrl++) (that’s the “Plus” sign) or use the “Magnifying Glass” tool to enlarge your image and select a dark brown (almost black) color ![]() . Select the one pixel ‘Smooth” brush
. Select the one pixel ‘Smooth” brush ![]() . Add the very fine line details where necessary and add some occasional short strokes and fine dots.
. Add the very fine line details where necessary and add some occasional short strokes and fine dots.
![]() 7b. Select a lighter reddish brown
7b. Select a lighter reddish brown ![]() and add fine line details where necessary with some occasional short strokes and fine dots.
and add fine line details where necessary with some occasional short strokes and fine dots.
![]() 7c. Select a light yellow and… Well, you get the idea. Adding Highlights and Details
7c. Select a light yellow and… Well, you get the idea. Adding Highlights and Details
8. Last but not least, Attention to Detail-
8a. Press (Ctr++) (that’s the “Plus” sign) to enlarge your image (Ctrl+Minus to reduce size) or use the “Magnifying Glass” tool to enlarge. Carefully build up your details just like the hair, dark to light shades of color.
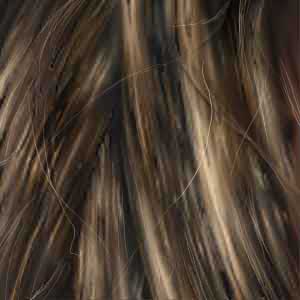
![]() 8b. Stray hair’s, Frizzies… What ever you want to call them. I call them realistic, and they will give any hairdo more realism than anything else!
8b. Stray hair’s, Frizzies… What ever you want to call them. I call them realistic, and they will give any hairdo more realism than anything else!
![]() 8c. The lip’s- Here is one place I do use black and white. Black in the corners of the mouth and around the teeth. White for the reflective highlight’s that imitate the model under bright light.
8c. The lip’s- Here is one place I do use black and white. Black in the corners of the mouth and around the teeth. White for the reflective highlight’s that imitate the model under bright light.
![]() 8d. The eye’s are probably the most important part of the body to emphasize realism. I only add a touch of pure white sparingly to the Pupil
8d. The eye’s are probably the most important part of the body to emphasize realism. I only add a touch of pure white sparingly to the Pupil
• Tip: Since there is no such thing as pure white or black in nature, try not to use them unless you really want to. • Tip: If you do not have a Wacom © Pen and Tablet System, I highly recommend buying one. Especially if you are used to drawing and painting with traditional tools like a pencil, pen and paintbrush.
• Tip: Save your hair color shades by placing the pointer/cursor ![]() over the “Colors Palette” When the “Paint Bucket” icon appears click and your color will be saved for future quick selection.
over the “Colors Palette” When the “Paint Bucket” icon appears click and your color will be saved for future quick selection.
• Final note: I hope that you have found this tutorial to be informative as well as useful. This is my first attempt at writing a tutorial so if I have left anything out or you have any suggestions on how to make it better contact me at: Contact page . Art is Life is Art!
(c) Infinitee Designs, Ralph Manis, www.infinitee-designs.com


Latest Comments