“Adding photorealistic hedges to your renderings ” by Alex Mincinopschi
I am sure, that if you work in the architectural visualization business you have struggled with the “hedges” problem more than once. The “natural” way to do it would be to add the hedges directly in 3d. However, this method may make the scene to heavy, and it is likely that you will encounter memory errors If you use 3d max and vray you can work it out by converting your 3d hedges into vray proxies; but still that will have an impact on the rendering time. Depending on the angle of your rendering you may be able to use opacity maps and you will obtain decent results. But what to do when your camera is not perpendicular to he opacity maps? (Everybody knows that in this case, the opacity maps will give you really unrealistic results due to the fact that it would be visible that there is no volume there).
3Dtutorials.sk recommendation:
To maximise the realism of your 3D rendering we recommend to use high quality photo textures from the #1 texture website www.environment-textures.com
After having struggled myself with this problem for some time, I have come to the conclusion that the following workflow will give the best results.
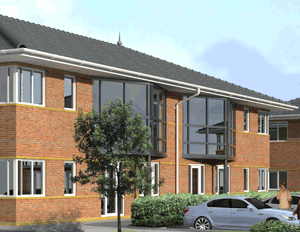
1) Render your scene with just a simple geometry instead of the complex 3d hedge model (after having applied a hedge texture that will generate the appropriate GI color)
2) Find a good highres picture of a hedge (or take one yourself) and crop out the background in photoshop. This is the hardest part because you have to crop it very carefully along each leaf in order to obtain a good result

3) Drag the layer of the resulting hedge over the base rendering and skew it until it matches the perspective of the base volume.

4) Now drag another copy of the layer and skew it so it will match the other side of the hedge. Crop the unnecessary part, following the contours of each leaf (like you did when you initially when you cropped the hedge from the original photo) (you may want to hide the other layer, since you don’t need it now) After having done that adjust the brightness and contrast to make the new layer a little darker (or lighter, depending on the case, but the main idea is to suggest the volume)

5) It is starting to look ok but until now it seems a little “blocky”; so let’s do a little fine tunning. Duplicate the old layer and make it darker (similar to the new face of the hedge). You should now have the dark layer placed above the original one. Using a smooth and wide brush start deleting the layer above from right to left (in our case) until you are getting closer to the other face.. You should obtain a smoother result

6) You can now fine tune it even further (though you can skip this step if your hedge is placed at medium or far distance from the camera). Merge the layers that you have so far and again make another copy of the resulting one. Make the one below darker and start deleting the base of the one above in a similar manner like you did in the previous step. This way your hedge will be a little darker at the bottom and lighter in the upper part.

Pages: 1 2


Latest Comments