“Object spreading methods” by Nicolas d’Haussy
Map driven spreading method.
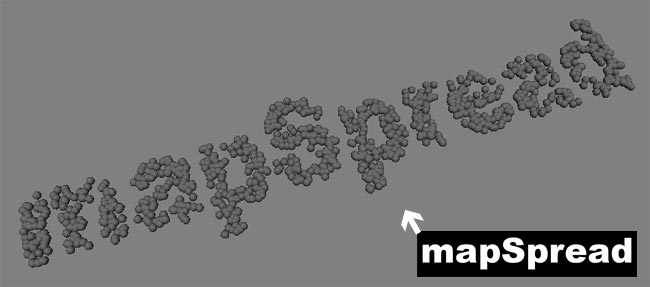
I have coded a melScript called mapSpread that spread objects function to a texture map. So you have just to design 2D a black and white map or use another Maya 2d texture in order to spread objects randomly. Useful in numerous cases, for instance create a forest crossed by a river. How does it work? This script analyses the color of a random point of the map. Then if the color is brighter than the threshold you have given, an object is placed here. Then analyses another point color… Download mapSpread melscript here (Read the header to learn how to use this script)
After placing, lets manage the object array/cloud via other melScript tools, such as the ones studied in last the part. (Note I think it is possible to use the geometryPaint tool this way after having applied this kind of alpha map on the object. Lets setup the paint tool so as to paint only on the white parts of the alpha maps. I have not already tested it.)
Using particle instancer.
Particle instancing is a really fast method. The particle intancer replaces each particle with an object. Obviously, to use use the particle instancer, you have to create a range of particles. You can use a particle emitter or the particle paint tool (as easily as the paint geometry tool). Then select your particle shape and create an instancer (Dynamics mode, menu Particles>Instancer options).
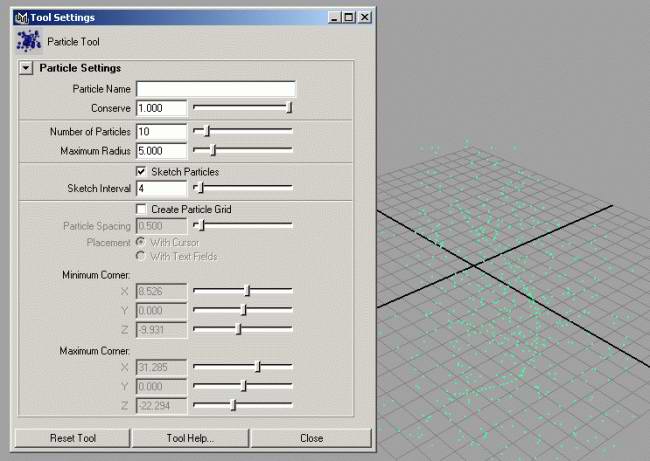
The particle instancer options will window appear. Select an object and add it to the list. Lets tweak parameters (don’t touch “cycle” related parameters). I advise you to turn the “Level Of Detail” to “BoundingBoxes” for a better workflow.
Lets take advantage of using particles… You could apply to the instanced objects complexes particle motion/effects such as using fields and collisions rigid solver (to reach the floor for example). Note that on creating a particle instancer you can set many connection with particles attributes which affect the instanced objects.How to bake particle instancer? To do so, open the hypergraph, select your instancer node, press Input and Output connections button. Then break the connection between the time node and the particle shape. Your spreaded instanced objects would keep this position in time.
Animation driven spreading.
We are going to “bake” animation. A kind of solid ghosting effect. First, animate one object the way you want (using any animation helpers you need, such as motion path). Then we will bake animation by simply duplicating the object at its position on the frames required. Also you would have non animated objects correctly placed. ! Last minute note : If you are using Maya 4.5 or higher, use the tool called Create Animation Snapshot.
You can do it by hand by sliding the time slider and duplicate (CTRL+D) the object at this position in time. Or using this simple script (opent the script editor and execute this script bellow to load this function). Select the the animated object(s) you want to bake animation, then is the command line (or in the script editor) type launch the function giving the arguments you want : bakeAnimation(3, 0, 25) for instance. This script does automatically what you would have done by hand… great!
global proc bakeAnimation(int $step, int $startFrame, int $endFrame) { if($step < 1) { error(“bakeAnimation : the step argument must be at least higher than 1.\n”); } string $selection[] = `ls -sl`; for($object in $selection) { for($n = $startFrame; $n <= $endFrame; $n+=$step) { currentTime -e $n; duplicate $object; } print($object + ” animation baked.\n”); } }


Latest Comments