“Morphing” by Gavin Watson
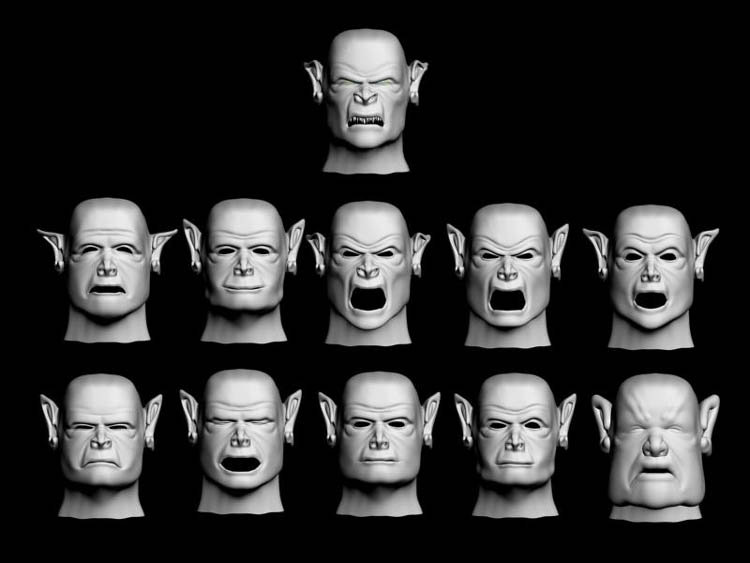
Ok it should be looking something like this
Select your base mesh and go to the modifier panel in the drop down select the “morpher” modifier
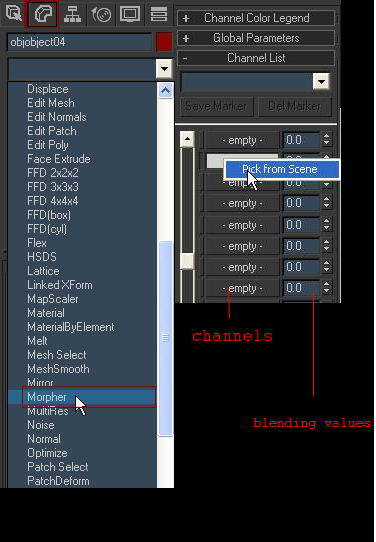
Now there will be a bunch of slots(channels) available to you ,yay we almost there!
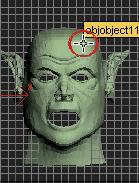
With your base mesh still selected right click one of the slots and choose “pick from scene” now choose one of your morph targets ,you will notice that the cursor will
Change when you hover over a mesh ,left click and whalah you have a morph target.
Repeat this process until you have selected all .
Now when use the numerical scrolls on the right you will be morphing your base mesh accordingly mixing all these morphs will give you even more expressions and you can use those again as more morph targets, to infinity and beyond!
So if everything has gone well you have probably stopped reading and are already having fun key framing those targets.
A last few things morpher is a very powerful modifier and can be used in many different ways, from muscle bulges to totally warped cartoonish expressions.
It also in turn creates more expressions and everything in between leaving you with boundless freedom. Most 3d packages have some sort morphing function. And its definitely not a new thing but has always been used as a simple way of breathing l ife into your character!
Short video with some morphing you can download here.
Hope you have enjoyed this lesson
(c) Gavin Watson, liquidsneek@webmail.co.za
A.k.a liquidsneek, A.k.a Sole torcher
Pages: 1 2


You really make it seem so easy with your presentation
but I find this matter to be really something which I think I would never understand.
It seems too complex and very broad for me. I’m looking forward for your next post, I will try to get the hang of it!