“Generating a realistic surfaces with Terragen and Maya ” by Berthold Grünhagen
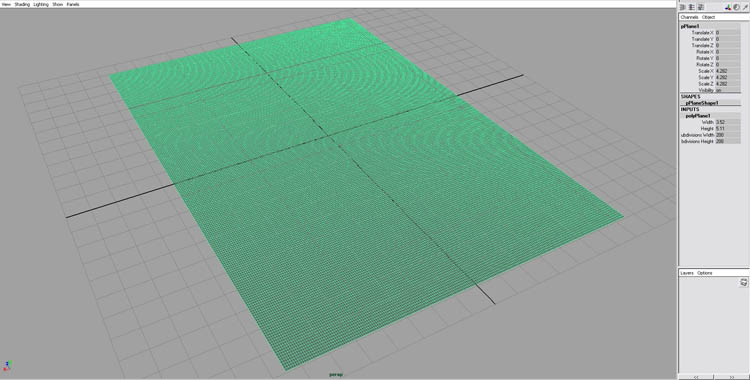
Click in the channel box on your plane in the input channel ( Inputs ). We need to set the Subdivisions width and height to a higher rate. We will have a well smoothed terrain. I set it here on 200. You can set it higher, but think about your computer-speed. Forming the terrain will take a few seconds!
Look for the dimensions of the plane. Thats important for fitting the generated maps to the plane. I choose 3.52 (width) x 5.11 (height).
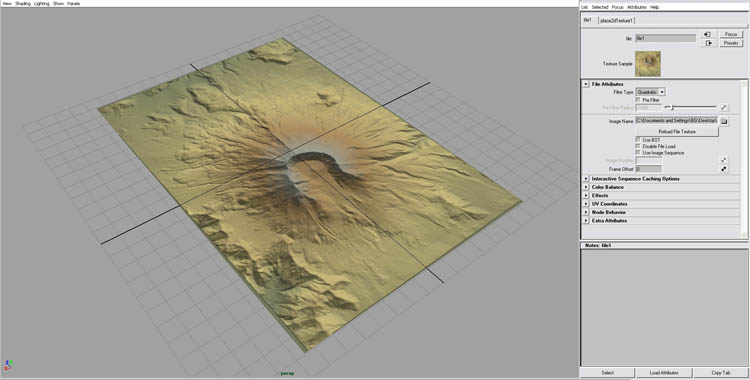
First we texture the plane to see how the dimension-settings work.
Assign a material like lambert to the plane and set the texture as color.
I saved the texture-map before in 3DEM as sthelens.bmp . Now I position it as texture.
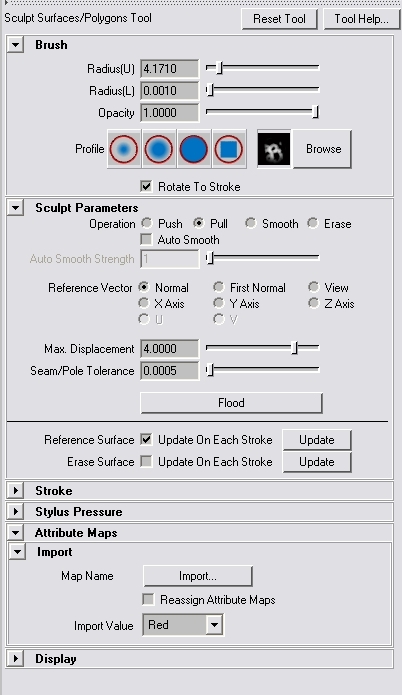
Now choose the Sculpt Surfaces Tool in your Polygon shelf. ![]()
In the Attribute Editor you can change various parameters. We have to set the Sculpt Parameters on Pull and the Max. Displacement for example to 4 because we have a mountain.
Maya needs to know how we want to sculpt. Choose in Attribute Maps the Import function.
I tested out the possibility to transfer the terrain data in a displacement map. But the described method with planes and sculpting is much easier and you can better texture it.
Then import your in Terragen build b/w-heightmap.
Generating a realistic surface
One comment
Leave a Reply
You must be logged in to post a comment.
Popular Tutorials
-
 Free set of photo references for our members
Posted on Nov 15, 2010
Free set of photo references for our members
Posted on Nov 15, 2010
-
 Photo References
Posted on Oct 6, 2010
Photo References
Posted on Oct 6, 2010
-
 Modeling Competition
Posted on Dec 10, 2010
Modeling Competition
Posted on Dec 10, 2010
-
 Modeling a High Definition Building – part 1
Posted on Dec 9, 2010
Modeling a High Definition Building – part 1
Posted on Dec 9, 2010
-
 FREE photo reference sets for you – only for registered members
Posted on Oct 2, 2011
FREE photo reference sets for you – only for registered members
Posted on Oct 2, 2011
Try something new

Thank you so much for the tutorial! This is very helpful as I’m trying to create terrain for my animation, although it might be a bit too high poly =)
Can we used this method on a slightly lower poly mesh?