"Achieve realistic looking lighting using max default scanline renderer" by Aziz Khan
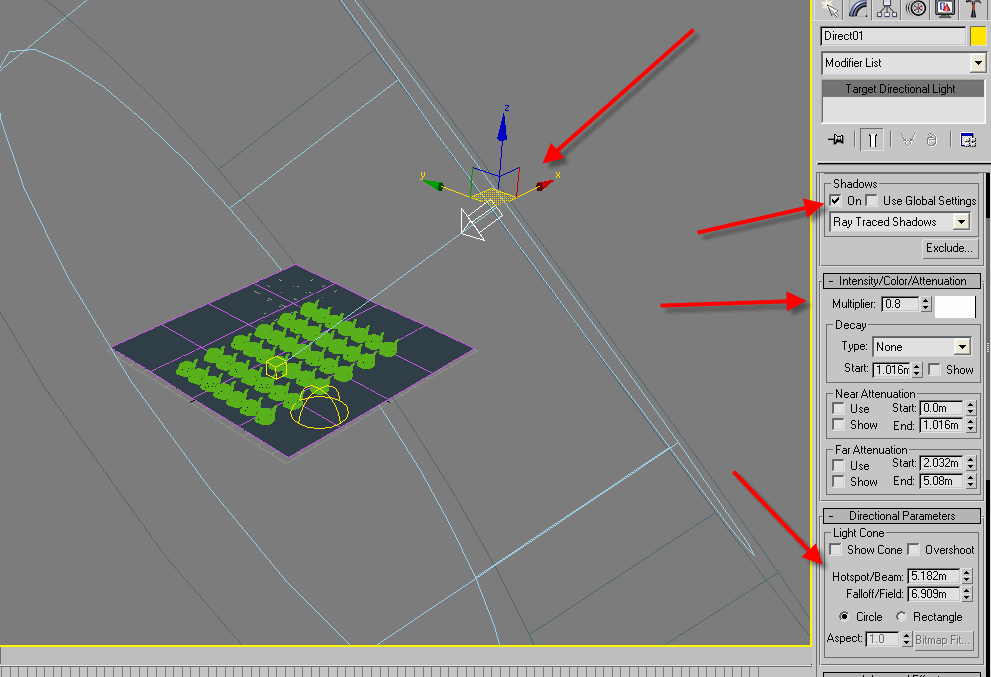
6-now place it somewhere as you like, and do the settings according to your need, in this case i have played with light intensity, hotspot beam and falloff field to cover my scene, but you could play with your own settings until you get your desired result,

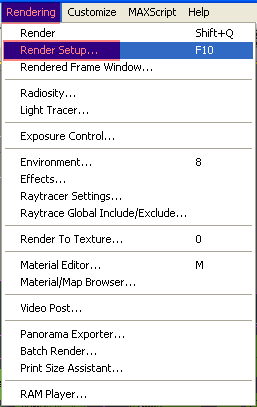
7-if you use skylight alone it will take much more time to render but here i will show you how to reduce the rendering time to bring it down to few minutes but it depends on your scene size, ok go to (Rendering) drop down menu and then chose (Render Setup),

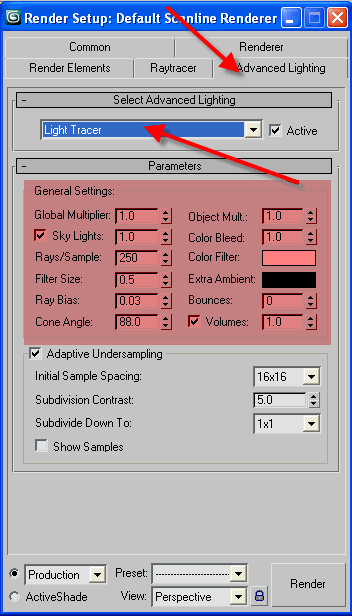
8-from (Render Setup) go to (Advanced Lighting) tab from the (Select Advanced Lighting) rollout chose (Light Tracer) and now you will see the controls for (Light Tracer) if you like play with the settings you will them really helpful and handy,

9-now once you finished with your settings its time to render out our scene, hit render and you will see your result,
so here is my final render below,

so i hope this could be helpful, if you still have any kind of comments, questions, and feedbacks please feel free to write me at,
(c) Aziz Khan, aziz3d (at) clubsrk.com
Pages: 1 2


thaxxxxxxxxxx man
A great work man, but i have one question. When i make a skylight i dont have an option to chek the render menu- cast shadows and rays per sample. Any idea? 10x
wowwwwwwwwwwwwwwwww
great tutorial, simple but brilliant. Just started to learn max, been a maya user for years. very helpful