"Sunbathing" by Massimo Righi

3Dtutorials.sk recommendation:
To maximise the realism of your 3D rendering we recommend using high quality animal photo references from the #1 texture website www.3D.sk
Introduction
 Photography has always inspired me, especially shots of nature and wildlife from the National Geographic magazines. I decided to use the American alligator as the subject for my project, perhaps because I’ve been always fascinated by reptiles (this species in particular has truly brilliant colors) and I wanted to really enjoy the modeling process.
I thought the title Sunbathing for my artwork would be nicely identified with the cold-blooded creature. What I wanted to achieve with my Sunbathing image, was to not only create a photo-realistic render, but also a 3D model for animation purposes, without the use of ZBrush (or similar software) and without adding any kind of post-production work to the final render.
I spent many hours doing research to find some good reference material and to get an idea about camera angles and the kind of feeling I wanted to recreate in my piece. Finally I found a couple of shots that really inspired me, where the alligator had bright colors and teeth on show, that seemed to demonstrate the perfect model for my portrait.

To realize the ideas in my mind, I made a sketch of the alligator , posing it in a couple of ways. The idea was to have a typical still shot of the predator relaxing in the sun, but at the same time to show him with his mouth open, displaying teeth, and perhaps some aggressiveness.

Modeling
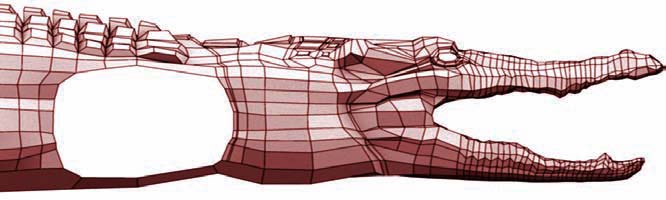
To start the modeling process in Maya, firstly I needed to create a low poly model of the alligator. I did this by following the reference images, starting with the head of the beast. Using a simple polygon plane and extruding the edges according to the global shape, I created the head first, then moved on to the rest of the body, leaving holes where the legs were to be connected and where the the eyeballs were to be placed (Fig.02).


Latest Comments