“Thumbnailing for quick concept creation” by Raymon Brugman

Added some minor things, like a footpath.

As you can see, I only added a background color now, which immediately gives the image mood, rather then just a plain white background

Started adding some colors to it, but it’s the colors didn’t feel right for me, so I started over with the color.

That’s better isn’t it? But still the scene is lacking something, so proceed to the next step, to find out what :D.

There we go, added some lightning, and a person sitting at a campfire, the scene now has some depth to it, it can tell a story rather then just be a plan picture.

Cleaned up the outer edges of the border, since I want to present my thumbnails in a neat way.

For the final result see the next page…
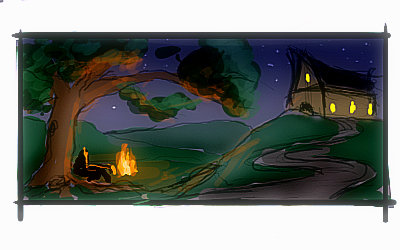
Well this is the final result after I corrected some colors. I’d usually do that when I make a colored image, since you can give the image much more depth with it.
Well that’s about it for now, I really hope this has helped you in anyway, even if it’s just a tiny tiny bit 🙂
If you have any questions regarding this tutorial or me, you can off course always e-mail me. Or maybe even mail me some thumbs you made, for some feedback.
Till next tutorial!
(c) Raymon Brugman, Thexray2000@hotmail.com
www.planet.nl/~assma031
Thumbnailig for quick concept creation
Popular Tutorials
-
 Free set of photo references for our members
Posted on Nov 15, 2010
Free set of photo references for our members
Posted on Nov 15, 2010
-
 Photo References
Posted on Oct 6, 2010
Photo References
Posted on Oct 6, 2010
-
 Modeling Competition
Posted on Dec 10, 2010
Modeling Competition
Posted on Dec 10, 2010
-
 Modeling a High Definition Building – part 1
Posted on Dec 9, 2010
Modeling a High Definition Building – part 1
Posted on Dec 9, 2010
-
 FREE photo reference sets for you – only for registered members
Posted on Oct 2, 2011
FREE photo reference sets for you – only for registered members
Posted on Oct 2, 2011
Try something new

Latest Comments