“Next Gen car – part 2” by Valentin Nadolu
Setting up the normals in Maya:
The way the object is illuminated is defined by normals, which are a vectorial attribute assigned to each vertex. This vector defines the direction in which the light is reflected off that vertex. To make it easier to setup vertex normals without having to define them one by one, Maya uses an attribute applied to each edge called Hard Edge(Normals->Harden Edge) or Soft Edge (Normals->Soften Edge). In short, if one edge is „hard”, the geometry will look like it is broken on that edge. Contrary, if the edge is „soft”, the mesh will have a continuous aspect on that edge. This is done by splitting one vertex into a couple of vertices with different normals for each one to create the „broken” appearance of the geometry. The lightning for a soft-edged area is calculated by averaging the values of the normals of adjacent vertices.Modeling for games will almost always mean that the normals have to be adjusted for the model to look its best. The problem comes when there is a normal map involved, normal map that requires as few hard edges as possible. I will talk more about this necessity in the 4th chapter.First thing to do before setting up the normals is using the Normals->Unlock Normals option to unlock the normals and allow for proper editing.The starting point is the mesh with all of its edges set to soft. This is done because there will be less hard edges than soft edges, so it makes sense to set them all as soft and then just change a few to hard as necessary. 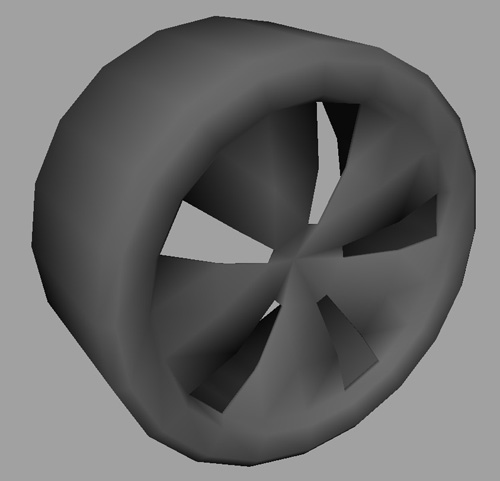
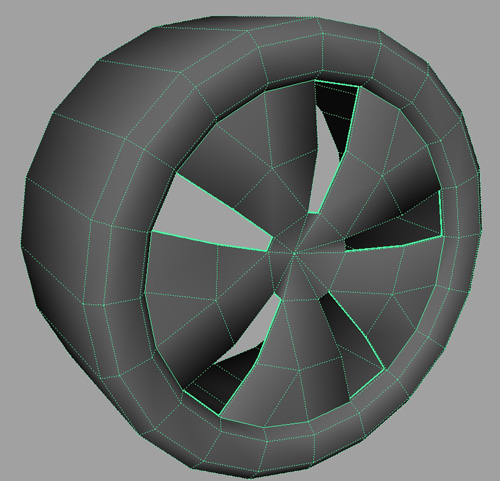
As you can see, the wheel doesn’t look that good with all the edges set to soft. The strange shadows visible on the mesh will have an adverse effect on the quality of final lightning with normal maps. Here are some simple rules that I use when setting up normals:a. All border edges count as hard edges. (not a rule, but a fact to be remembered :))b. For curved continuous surfaces, set the edges as soft (2 and 3 in the image)c. For angles that have a concave shape, use hard edge (4)d. For angles that are close to 90o use either soft edge if the edge is facing the camera (5) or hard edge if it is not visible(6)The last rule is good for objects that do not rotate in the scene. As always, these rules can be broken as long as the final result is good.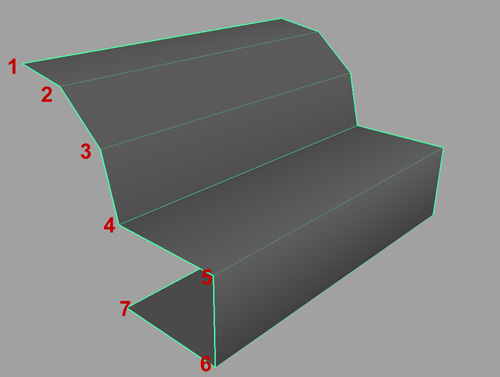 Using the above rules, here is how the wheel looks. The continuous edges are hard and the dotted line ones are soft. This view mode can be activated by shift right-clicking on the object and selecting Soften/Harden Edge->Toggle Soft Edge Display.
I recommend setting up the normals before optimizing the geometry. This way you can take shading into account when the polygon reduction is done. As the hard/soft edge setting in reversible, it is easier to change edges from hard to soft or vice-versa than to reduce the entire mesh with all the edges set to hard only to realize that once the normals are set, some areas require extra polygons.Next, some images that show the way the normals are set on the car’s body: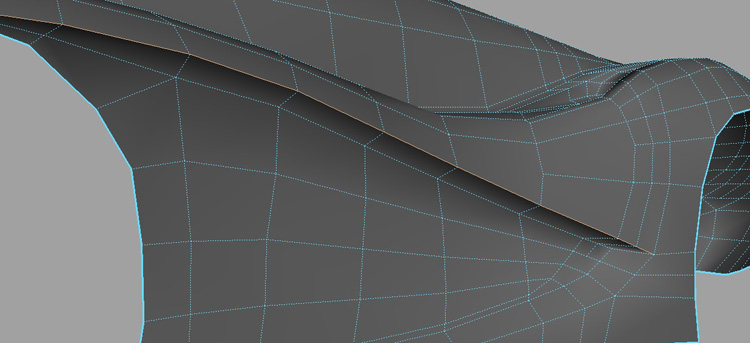
Next Gen car – part 2
Popular Tutorials
-
 Free set of photo references for our members
Posted on Nov 15, 2010
Free set of photo references for our members
Posted on Nov 15, 2010
-
 Photo References
Posted on Oct 6, 2010
Photo References
Posted on Oct 6, 2010
-
 Modeling Competition
Posted on Dec 10, 2010
Modeling Competition
Posted on Dec 10, 2010
-
 Modeling a High Definition Building – part 1
Posted on Dec 9, 2010
Modeling a High Definition Building – part 1
Posted on Dec 9, 2010
-
 FREE photo reference sets for you – only for registered members
Posted on Oct 2, 2011
FREE photo reference sets for you – only for registered members
Posted on Oct 2, 2011
Try something new

Latest Comments