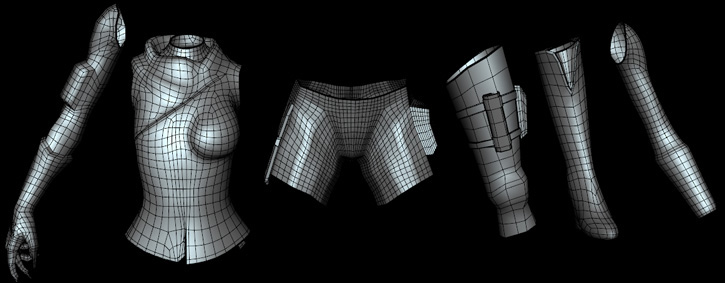
“Making of Varga ” by Paul Tosca After i have modeled a low version of the whole character i had a better idea how to distribute the polygons between the main character the pet and weapon/gear. The next step is to start breaking the model into pieces and cleaning them up. For sculpting its better to have clean topology , mostly quad faces , try to aviod triangles and situations when more than 4 polygons will meet at one point( add extra tesselation to get rid of all the irregularities in the mesh … this way you will have more predictable results when subdividing and sculpting) , you can move triangles and points where more than 4 quads will connect in the areas that are less important/visible.Also you should aim for a topology that will have mostly square quads ( avoid polygons that are more than double in one direction than in the other …. add extra tesselations to fix this … remember this will be for high rez so the polycount won’t matter ). Below are some pieces ready to be imported into mudbox and detailed further.
4.2.Detailing in Mudbox
The next step is to import the cages into mudbox and add as much detail as you or your machine can … one will break eventually:). This is the most fun part for me in the whole workflow …i will show you some time lapse images with the progress for some pieces. boot (little below 1mil tris for the highest level)

hips (1.6 mil tris for the highest level)

leg (around 500k tris for the highest level)

Pages: 1 2 3 4 5 6 7 8 9 10 11 12 13 14 15 16 17 18 19 20 21 22 23 24 25 26 27 28 29 30 31


Latest Comments