"Making of Trapped" by Massimo Righi
From that moment to the composition of the scene “Trapped” they are passed several months. Returned from the travel of the south‐east of Asia I found some of the photos that I had taken and can be good motivation in order to resume the model of the parrot and to try to give it more peculiarity. To recreate a 3D scene from photograph is always a big challenge but why not to give it a chance! :‐)
Therefore I decide to try… I have opened the “old” model in Maya, I have divided the beak (before was joined) and I have modeled the inside of the mouth and the tongue.

The layout of the UV’s is always boring and slow but needs to be done in the right way to achieve good texturing. I used a mixture of planar and cylindrical projections for that. Once finished with the UVs I have duplicated the other half of the model, merged vertices and I have put it in pose using a pair of joints in order to move the head and the leg. I have decided to choose a different camera angle from the one of the reference photo because the frontal angle seemed too much extreme and the colors of the head feathers would be remained too much hidden. Therefore I have tried several angles‐shot and focal lenses till I found which seemed to be the better choice.
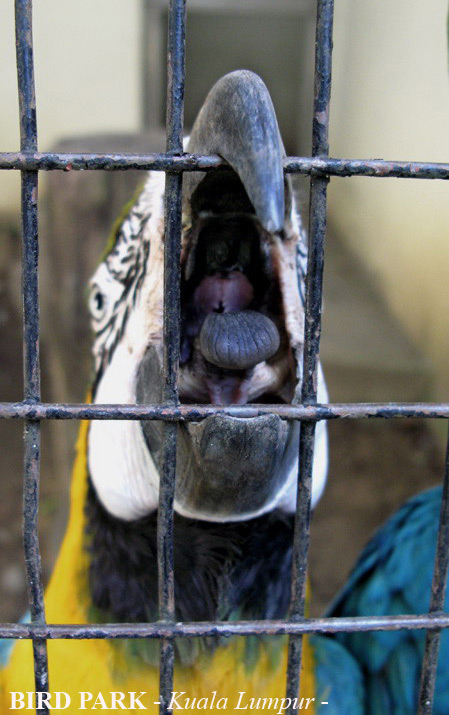
I have deleted (Cut Face Tool) all the parts outside of the camera gate in order to make the scene lighter and then I have recreated the portion of cage that I needed. I have modeled (Maya Sculpt) the details after I have made the mesh denser especially close to the beak and the eyes. Then added some fur using Maya 3D Paint Tool on the head, close to the nostrils in order to render the parrot side more realistic.

Making of Trapped
2 comments
Leave a Reply
You must be logged in to post a comment.
Popular Tutorials
-
 Free set of photo references for our members
Posted on Nov 15, 2010
Free set of photo references for our members
Posted on Nov 15, 2010
-
 Photo References
Posted on Oct 6, 2010
Photo References
Posted on Oct 6, 2010
-
 Modeling Competition
Posted on Dec 10, 2010
Modeling Competition
Posted on Dec 10, 2010
-
 Modeling a High Definition Building – part 1
Posted on Dec 9, 2010
Modeling a High Definition Building – part 1
Posted on Dec 9, 2010
-
 FREE photo reference sets for you – only for registered members
Posted on Oct 2, 2011
FREE photo reference sets for you – only for registered members
Posted on Oct 2, 2011
Try something new

Very impressive!
These kind of works inspire me 🙂
I wish , you’ll give me more and more like that ! thanks a lot