“Making of Tiger ZOO ” by Massimo Righi
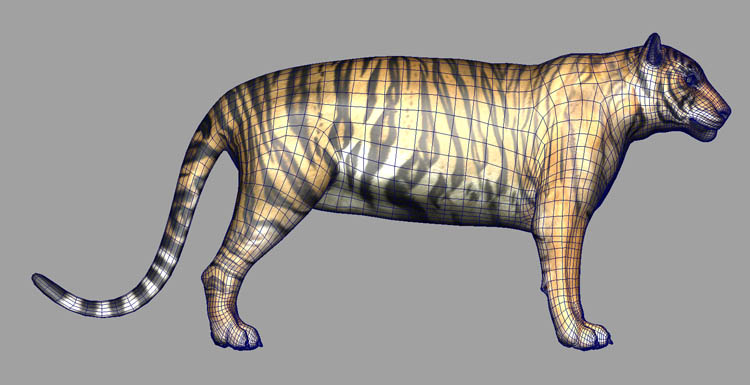
I ended up with 4030 polys for the main tiger mesh and 3166 polys for eyeballs, teeth, gum and tongue. I than had to start the UV mapping process before adding details. I needed to have a mirrored UV layout, in order to do that I first made the UVs for half of the model than I duplicated the other half and mirrored the UVs flipping them. I used various projection to make the Uvs using planar and cylindrical mapping tools.. For some parts like ears and portions of the chest I made some detached projection in order to avoid some stretching when I had to apply the textures.

I used a simple checker, applied to a Lambert shader, to check the overall process whilst tweaking the UVs. After the Uvs I made a polysmooth of the model and started using the Maya Sculpting tool to achieve some detail playing with punch, pull, smooth and the very usefull relax tool (new addition in Maya 8.5).

Texturing
I believe that the texturing part is extremely important as the majority of the final effect is created by the textures. I decided to go for a 4k resolution map wich I think it was good enough to achieve the textures details such as the fur stripes. In Photoshop I started creating the textures using a Wacom Tablet with a mixture of photographs previusly taken at the zoo and freehand painting. I used the clone tool as well as custom brushes, always switching between Maya and Photoshop to check how the textures behaved on the model
Once happy with the Photoshop work I moved on adjusting the seams. The texture’s seams were created by the edges where the UVs were cut during the mapping process and I used Maya 3D Paint tool to correct them, using especially the clone tool. I finally back in Photoshop to create the other maps: specular, bump and diffuse.

I used a Blinn shader for the body, a Phong for the eyeballs and a Binn for the teeth.
Making of Tiger ZOO
One comment
Leave a Reply
You must be logged in to post a comment.
Popular Tutorials
-
 Free set of photo references for our members
Posted on Nov 15, 2010
Free set of photo references for our members
Posted on Nov 15, 2010
-
 Photo References
Posted on Oct 6, 2010
Photo References
Posted on Oct 6, 2010
-
 Modeling Competition
Posted on Dec 10, 2010
Modeling Competition
Posted on Dec 10, 2010
-
 Modeling a High Definition Building – part 1
Posted on Dec 9, 2010
Modeling a High Definition Building – part 1
Posted on Dec 9, 2010
-
 FREE photo reference sets for you – only for registered members
Posted on Oct 2, 2011
FREE photo reference sets for you – only for registered members
Posted on Oct 2, 2011
Try something new

good!