“Making of Paragalis – part 2 ” by Marcus Dublin
Continuing work on the color, shading and highlights, I kept refining the existing strokes having them blend better with the skin. At this point I want to make sure that I don’t go too far with my highlights and shading, at the same time I want to keep things fairly dynamic and interesting. It’s really just a matter of making good choices and keeping the overall contrast, and color temperature in check!

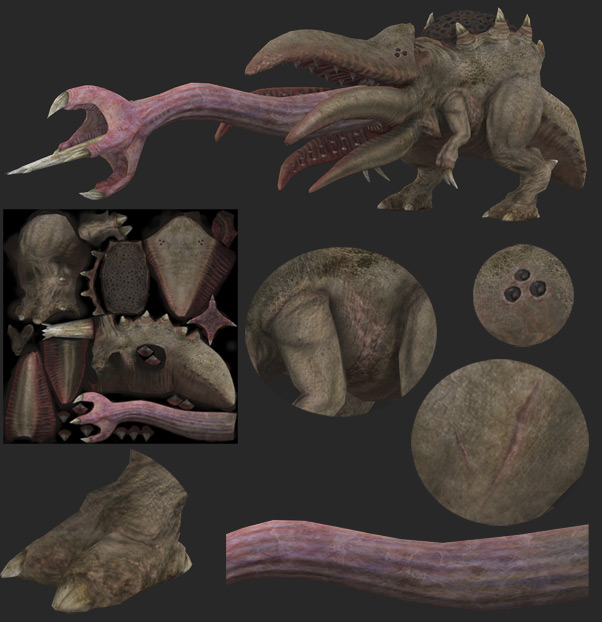
At this point I’m pretty happy with the overall tone of the skin and will now move onto adding additional details. I made a few new layers within my layer group and started adding a number of little touches to help sell the believability factor of the creature. I really love this stage since it’s the little things that count, elements like scars, skin distortion, dirt, blotches, slime, etc. I created a number of these elements from scratch before hand and placed them where appropriate. You can see some of the results in the close up below.
By the way: I belief that a little goes a long way and I tried to make the extra details noticeable but not overpowering!
In Closing: The method used to create the diffuse thus far is only one way to go and there are number of other avenues that I could have taken. Instead I leaned towards the method that best serves desired visual target.
Creating the Specular Map
With the diffuse map completed, it’s time to focus on the spec maps; I’m going to use two different maps to sell the specularity of the model. The first map that I’m going to work on is the color specular, a color spec is basically a map that alters the color of the specular highlights. When it came to the creature, I used a variety of colors to help enhance and offset the diffuse map colors. First I’m going to start on how I made the map in question. The first thing I did was merge all of the layers in my diffuse map, once I did that I created four new layers. The first layer is a de-saturated copy of the base layer; then I created a second layer called color 1, the third layer color2, and then color3. From here I set the numerical color layer properties to “color”, and started filling them with the desired colors. First up is “color1”, which is green, I chose green because I felt that it would play off of the semi warm mid tones throughout the creature’s skin. Next up is color2; I choose blue for this because it offers up the highest level of shininess, which is exactly what I wanted to help sell the moist and clammy nature of the tongue, back hump, and soft tentacle under skin. Last but not least is color3, I used dark orange in some of the shadow areas to basically warm up and play off the dark values in the diffuse map.

Now the specular color map is completed it’s time to move the specular level, otherwise known as specular power “Special note: different engines and modeling applications have various names for this”. The specular levels map basically alters the intensity and location of the highlights based on their black/white values. 100% white receives the brightest intensity of light and a 100% black doesn’t receive light at all! It’s good strike a middle ground and incorporates a mix of white, grey and black. That being the case you can see below that I took my color spec and removed the colored layers. Once I did that I darkened the base layer by overlaying the light map on top of it, after that I merged the two. Then I added a number of layers reflecting the highlights, pin lights, and darken areas. The highlights layer was used to created broad lights across large surface areas and pin lights were used for the opposite. The darken layer was used to tone down super bright spots such as the tip of the barb and teeth, this is especially important since some game engines will blow out anything approaching 100% white. On a last note I wanted to point out that I refrained from using any kind of grain overlay often seen in human skin. I choose not to do so due to the fact that the creature’s skin already provides a nice scattered effect. Adding more grime and noise on top of the established skin would create a muddy effect when shown in the light, this looks even worse when the resolution is reduced!

Making of Paragalis – part 2
Popular Tutorials
-
 Free set of photo references for our members
Posted on Nov 15, 2010
Free set of photo references for our members
Posted on Nov 15, 2010
-
 Photo References
Posted on Oct 6, 2010
Photo References
Posted on Oct 6, 2010
-
 Modeling Competition
Posted on Dec 10, 2010
Modeling Competition
Posted on Dec 10, 2010
-
 Modeling a High Definition Building – part 1
Posted on Dec 9, 2010
Modeling a High Definition Building – part 1
Posted on Dec 9, 2010
-
 FREE photo reference sets for you – only for registered members
Posted on Oct 2, 2011
FREE photo reference sets for you – only for registered members
Posted on Oct 2, 2011
Try something new

Latest Comments