“King Kong – part 3. ” by Dan LuVisi
Introduction:
Hello and welcome back! In the last tutorial we went over the basics on how to finish up Kong and smudging techniques. We also went over some of the detail tips such as Kong’s hair and etcetera. In this tutorial, I will show you how to paint Ann Darrow, our female lead. We will start with the sketch and move on through the color layout, a new way of blending, and a first for me, the hair tutorial. Now before I begin, I want to pre-warn all the readers. There is no possible way for any artist to teach how to draw a picture, from front to back, unless you want a 500 page tutorial. I will give you as much tips and tricks as I can, but the rest is up to your patience and talent as an artist. That being said: let’s begin!
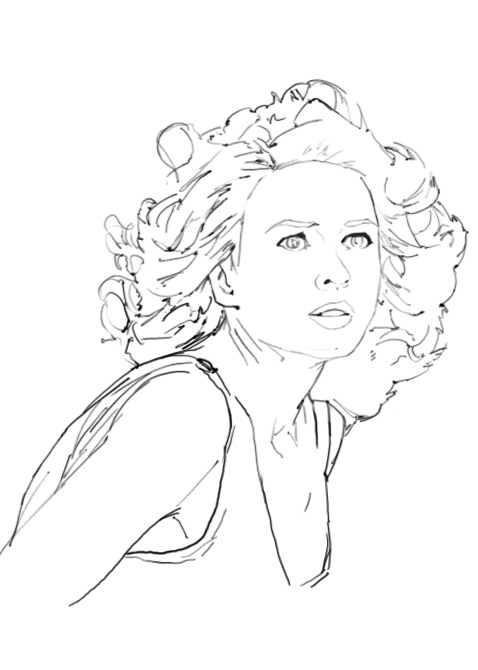
The Sketch of Ann :
If you read the first part of the tutorial, you’ll be able to pick this up hopefully easy. What I usually do, as said in the previous tutorial, is start from scribbles, sketches, to painting. You should already have your main line art, as instructed in Part I
3Dtutorials.sk recommendation:
To maximise the realism of your CG character we recommend to use high quality photo references from the #1 reference website www.female-anatomy-for-artist.com
Once you have this all set up, then we’ll start to move on to color blocking. Now, before we start on this, be warned: there will be much trial and error in the tutorial. Sometimes Ann will look funny, sometimes like a melting android. Although at times you’ll hate your image of her, by the end I hope you’ll love it. Be patient, if you cant get it the first time, keep trying! Never give up.
Shall we start?
Coloring, Laying Down the Blobs:
( Before we begin, many parts on her face were done all together, going from one part to the next. Pay attention, I won’t teach it like that, but rather by parts, which means you’ll have to go back through images.)
Alright, now this is going to be different than Kong’s color blobbing. In our image, we’re going to have to lay down a base layer of skin, something to just fill in that open line art. As instructed in Part I, this is how I paint. Make sure the Line Art is a new layer and not connected to the background, from that layer, we’ll place a new layer underneath it, and fill it in with the underneath skin tone; which can be seen in

After you have that filled in, which should be pretty quick, start to block in shadows and highlights. Darker tones underneath the eyes put some soft blues on her forehead and deepen her hair with the yellow differences. Now the difference here between Ann and Kong’s color blocking, is that I use a soft brush on her, instead of a hard one on Kong. A soft brush is the “Soft/blurry” looking default brush, as the hard brush is the first set of flat brushes in your selection. The soft brushes give the advantage of a haze like feel to the skin, and are easier to blend in with colors. I used a soft brush on her forehead and cheek bones (this was after I laid down my basic colors with the hard brush). Her eyes are up to you, and if you followed my eye tutorial in Part I, you should get the hang of it. Otherwise, there are numerous eye tutorials online; we already have so much more to talk on. As much as I’d love to put an eye tutorial in here, I will say this: You need to get those eyes perfect. Eyes on celebrities can totally make them look different, be careful here. Ill try to throw some tips as I move on.


Great effort within this Jesse. Another thing in relation to Yext that is certainly well worth bringing up: if some of the actual mate internet sites has their own own report which is considered possession involving in that case that data takes priority.
[url=http://runforhumanrights.org/ugg-boots/uggs-moccasins-on-sale.html]uggs moccasins on sale[/url]