“Frog King” by Chris Beatrice
Rough Painting
The hardest part of the process for me is turning that flat, textureless color rough into a vibrant, living surface that has texture and depth. To get over this I quickly paint in rough forms for the entire picture, then make one more pass at adjusting the colors. I use “variations” in Photoshop for this, and also the color balance adjustment tool. To achieve even finer gradations of adjustment than the variations tool allows, I duplicate the layer, apply the variation, then fine tune by adjusting the transparency of the layer, and finally merging it down when I’m happy with it. I never paint on different layers, though. I don’t incorporate the pencil sketch into the final image, as this just muddies up the colors I have worked so hard to plan out. The pencil sketch stays on its own layer as a rough guide for the painting. When the rough painting is done, I’m ready to start the final painting. In some ways it’s almost like I paint the whole picture twice, but really what’s happening is I’m working the whole picture the whole time. The rough painting only takes a couple of hours, and when it’s done the picture is very well established in terms of its main relationships and forms. Of course, I still made big changes to the frog and girl characters when I did the final painting…


Painting
I want my digital marks to look like real paint – opaque paint to be specific. I use Corel Painter (version 8), and spend a lot of time setting up just one or two brushes for the given picture. In this case the entire picture was done with a single brush, adjusting only the grain slider (and size of course) for different parts of the scene. I periodically drop into Photoshop to resize or shift compositional elements, adjust levels and colors, and so on. When I’m painting the process needs to remain very dynamic, so I want all the control on the stylus and a couple of quick keys that I can hit without having to look at the keyboard. I keep my left hand on the lower left area of the keyboard, where I constantly hit the “alt” key to switch to the eye dropper for color picking, and “cntrl-z” for undo. In this way I can make quick, spontaneous and lively brushstrokes without having to worry about mistakes slowing down the process. Periodically I jump to the bracket keys to change the brush size as well. I never paint using dodge or burn, or transparency. It’s all opaque colors painted in finer and finer gradations, with a lot of bleed for smearing and blending. I set the resaturation in Painter very low (around 20%) and the bleed very high (around 80%). Both are tied to stylus pressure (bleed is reversed) so the harder I press down the more coverage I get; the lighter I press the more smearing. Opacity remains at 100%. This results in a brush that is simultaneously an opaque painter and a blender. I use the Grainy Hard Cover subcategory so I get some texture as well. Grain (and sometimes squeeze) is the only variable I change for different areas of the painting (between 10% and 20%), but it is not tied to stylus pressure.. The two brushes sampled at the right show the incredible range of effects you can achieve with just this one brush, and varying stylus pressure. With a very small brush size and lots of graininess (achieved by lowering the grain setting), the mark becomes a broken line. I used this approach for the highlights on the bucket, which gives a rough metal effect.

Range of textures in my Painter brush, achieved by adjusting grain

Sample strokes for metal highlights, and final rim, painted with lots of graininess
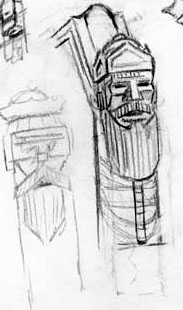
Reference and Studies
A couple years ago I made up my mind to stop using visual reference when I make pictures. Even if some of my forms are more stylized because of this, I feel it results in a picture that is both more uniquely my own, and more internally consistent. I do make pencil studies, sometimes while looking at relevant objects, sometimes not. As I go through my day I’m constantly studying the forms I see around me. Later I’ll pick up the sketch book and draw from memory, incorporating my own enhancements and modifications as well. The process is: study, internalize, digest, germinate and finally (re)create. This in turn allows the work to remain fresh and lively because the “studying” aspect has been removed from the painting process itself.


Latest Comments