“Blender as Compositing-Tool” by Berthold Grünhagen
Part 2 – Image sequence
Blender also is a good tool for compositing image sequences and to get a clip out of it. We have our compositing-network finished and at least we render a whole sequence. Herefore I rendered a little image sequence (about 100 pics) with the passes color, diffuse, shadow and specular. To get your image sequence in your image-nodes just click on your image-node on the button Image-Type . You can see the possibilities Sequence, Movie and Image . Use sequence and load the first image of the sequence like picture1.tif.
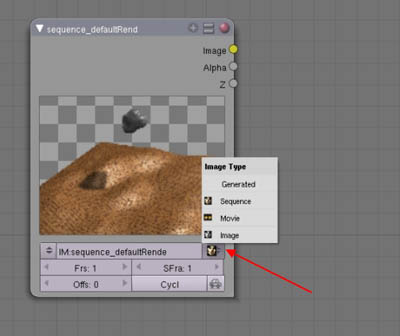
Now you can see a preview of each frame of the sequence by selecting the frame. But activate the BACKDROP-Button and button for refreshing the preview at frame changes (looks like a car)! For a rendered preview you can also push the RENDER button.

It’s important to set the number of the start-frame and the amount of the frames to be rendered in the final clip. The amount of images is the value in Frs (frames) , the number of the start-frame is called SFra (start frame).

Now we are ready to go! The important settings for the final step are:
1. choose “Do Composit” and not “Do Sequence”!
2. set start- and end-frame
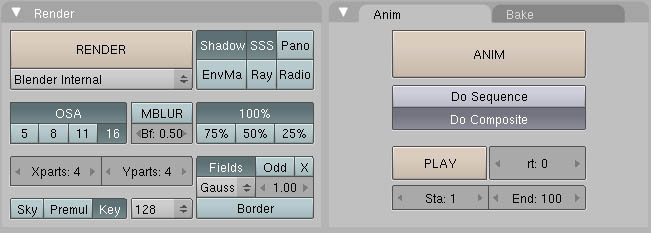
3. select size and format of the clip (here 1024×768 and AVI); you can also render an image-sequence again by choosing a picture-format like TIF or JPG
4. choose the output-folder

Now push the ANIM button. Each frame is shown in Blenders render-window during the renderprocess and the result is put in your output-folder.
(c) B. Grünhagen, www.i3dtutorials.com


Latest Comments